


12-79
Cisco Prime Network 4.0 User Guide
OL-29343-01
Chapter 12 Monitoring Carrier Ethernet Services
Working with VPLS and H-VPLS Instances
Adding VPLS Instances to a Map
You can add the VPLS instances that Prime Network Vision discovers to maps as required.
To add a VPLS instance to a map:
Step 1 In Prime Network Vision, select the required map or domain.
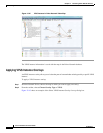
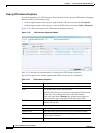
Step 2 Open the Add VPLS Instance to map dialog box in either of the following ways:
• In the toolbar, choose Add to Map > VPLS.
• In the menu bar, choose File > Add to Map > VPLS.
Step 3 In the Add VPLS Instance dialog box, do either of the following:
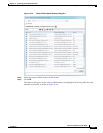
• To search for specific elements:
a. Choose Search.
b. To narrow the display to a range of VPLS instances or a group of VPLS instances, enter a search
string in the search field.
c. Click Go.
For example, if you enter
VPLS1, the VPLS instances that have names containing the string VPLS1
are displayed.
• To view all available VPLS instances, choose Show All and click Go.
The VPLS instances that meet the specified search criteria are displayed in the Add VPLS Instance
dialog box in table format. The dialog box also displays the date and time at which the list was generated.
To update the list, click Refresh.
Note If an element is not included in your scope, it is displayed with the locked device icon.
For information about sorting and filtering the table contents, see Filtering and Sorting Tabular Content,
page 2-42.
Step 4 In the Add VPLS Instance dialog box, select the instances that you want to add. You can select and add
multiple instances by pressing Ctrl while selecting individual instances or by pressing Ctrl +Shift to
select a group of instances.
Step 5 Click OK.
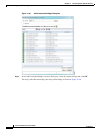
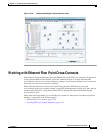
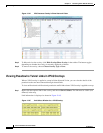
The VPLS instance is displayed in the navigation pane and in the content area. In addition, any
associated tickets are displayed in the ticket pane. See Figure 12-42.