4-36
Cisco Prime Network 4.0 User Guide
OL-29343-01
Chapter 4 Device Configurations and Software Images
Software Images
If it cannot proceed, you will not be permitted to continue. Otherwise, click Next.
Step 8 Enter the scheduling information in the Schedule Activation page. By default, jobs are scheduled to run
as soon as possible.
Note The time you specify here to schedule the activation job is the server time.
Step 9 Enter the e-mail ID(s) to which to send a notification after the scheduled activation job is complete. For
two or more users, enter a comma-separated list of e-mail IDs. A notification e-mail is sent based on the
e-mail option specified in the Image Management Settings page.
Step 10 (For Cisco IOS only) Activate the Warm Upgrade option, which allows a Cisco IOS image to read in
and decompress another Cisco IOS image and transfer control to this new image (thus reducing the
downtime of a device during planned software upgrades and downgrades).
Step 11 (For Cisco ASR 903 devices only) Check the ISSU option, to update the router software with minimal
service interruption.
Step 12 Click one of the following to specify the operation mode, if you have selected two or more devices in
the Select Devices page.
• In Parallel—Activates all packages for the devices at the same time.
• Sequentially—Allows you to define the order of the devices to activate the packages for.
Step 13 Click Finished to schedule the activation.
Activate After Performing Boot Priority Modification for Cisco ASR 5000 Series Devices
To modify boot priorities for Cisco ASR 5000 series devices and then perform activation:
Step 1 Choose Images > Activate > IOS and the activation method (by Devices).
Step 2 Choose the Cisco ASR 5000 device family from the table header.
Prime Network displays all managed Cisco ASR 5000 series devices. It also displays the images that are
currently running on the devices. You can filter by device name, IP address, element type, running
image, or software version.
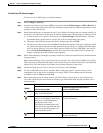
Step 3 Select a Cisco ASR5000 series device, choose the Perform Edit Boot Priorities option from the
drop-down menu in the table header, and then click Next. The Select Boot Config page appears.
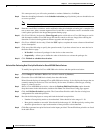
Step 4 Click the Edit Boot Priorities hyperlink. The Current Boot Priorities table lists the existing boot
configuration files with their priorities.
Step 5 Provide the following inputs to set up and fetch the desired boot priorities:
• Number of boot priority entries to be maintained. Value should be in the range of 1-10.
• Boot priority number to start with. Value should be in the range of 1-100. Boot priority starting value
should be greater than or equal to the number of boot priorities to be maintained.
Step 6 Click Go to generate boot priorities based on the inputs provided. The modified boot priorities are listed
in the table below.


