4-38
Cisco Prime Network 4.0 User Guide
OL-29343-01
Chapter 4 Device Configurations and Software Images
Software Images
• When upgrading the core router package (such as c12k-mini or comp-hfr-mini), the manageability
package (such as c12k-mgbl or hfr-mgbl-p) must be upgraded at the same time to ensure that the
router remains manageable after the reload.
• Cisco IOS XR routers support the clear install rollback oldest x command, that allows you to
manage the number of rollback points maintained on the router. Executing this CLI command
periodically on the router allows you to limit the number of rollback points. When executing this
command, you must ensure that at least one valid rollback point is always maintained to enable
Prime Network to show the package status correctly. We recommend that you maintain about 20
rollback points on the router.
• NEIM does not support upgrading a router running Cisco IOS software to Cisco IOS XR software.
For more information, refer to the System Management Configuration Guide for the Cisco IOS XR
release and device of interest.
Add Cisco IOS XR Packages
Image Management supports package addition as a separate operation for Cisco IOS XR devices. To
complete the package management life cycle, Image Management supports adding a package from a pie
file, which is already present in the Cisco IOS XR device storage.
Before you begin:
Make sure you have the permissions to perform package addition. You will not be allowed to schedule
a package addition job, if you do not have permissions.
To add packages for Cisco IOS XR devices:
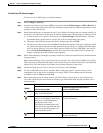
Step 1 Choose Images > Package Add. The Package Add wizard displays all the Cisco IOS XR devices in the
Select Device(s) page.
Step 2 Select a device and click Next to open the Select Package(s) page. Prime Network displays all the
packages available for the selected device.
Step 3 Choose the package(s) that you want to add for the selected device and click Next to open the Schedule
Package Addition page in the wizard.
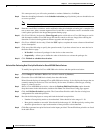
Step 4 Enter the scheduling information. By default, jobs are scheduled to run as soon as possible.
Note The time you specify here to schedule the package addition job is the server time.
Step 5 If you have selected two or more devices in the Select Devices page, click one of the following to specify
the operation mode:
• In Parallel Order—Add packages for all devices at the same time.
• In Sequential Order—Allows you to specify the order of the devices to import the packages for.
Step 6 Enter the e-mail ID(s) to which to send a notification after the scheduled package addition job is
complete. For two or more users, enter a comma-separated list of e-mail IDs. A notification e-mail is
sent based on the e-mail option specified in the Image Management Settings page.
Step 7 Click Finished. Prime Network schedules the job and redirects you to the Jobs page, where you can
monitor the status of the job.


