


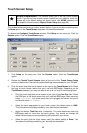
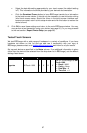

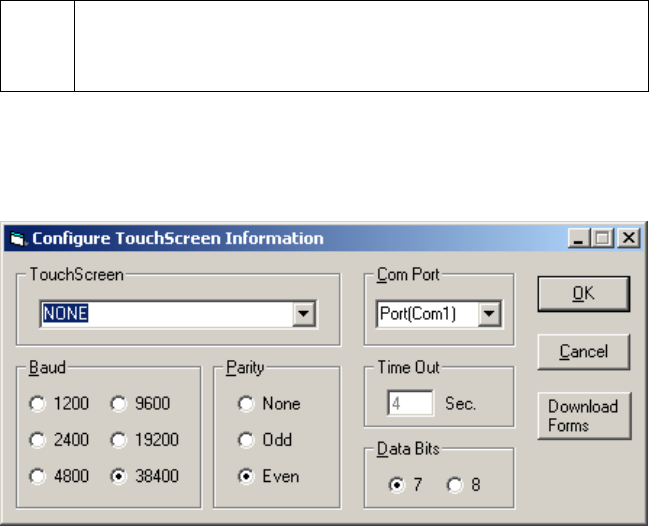
Touch Screen Setup
Simple Explanation: This window allows you to set up a touch screen
device. If you do not have a touch screen installed on your machine, leave this
window set to its default setting (as shown below, with NONE selected) and
skip ahead to the next section, Report Printer Setup (see page 98).
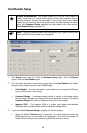
This window allows you to set up a touch screen device. If you do not have a touch screen,
the None option (in the TouchScreen drop-down list) should be selected.
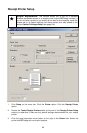
To access the Configure TouchScreen window, Click Setup on the menu bar. Click the
Devices option. Click the TouchScreen option.
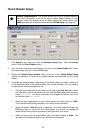
1. Click Setup on the menu bar. Click the Devices option. Click the TouchScreen
option.
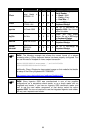
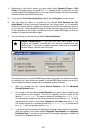
2. Review the Tested Touch Screens table (at the end of this Touch Screen Setup
section) to determine if there are any special settings recommended for your PIN pad.
3. Click the small drop-down arrow button (to the right of the TouchScreen field). Select
the type of touch screen device that you'll use with PCCharge. Depending on the
TouchScreen selected, you may not need to set up all (or any) of the following fields.
• Click the small drop-down arrow button to the right of the Com Port field. Select
the COM port of the touch screen that you'll use with PCCharge. Most users can
select Port(Com1), but some users may have plugged the device into port 2
and should select Port(Com2).
• Select the baud appropriate for your touch screen (the default value is 1200).
This information should be provided by your device's documentation.
• Notice the default Time Out value (4 seconds). This value determines how long
PCCharge waits for input from the touch screen. You should not change the
default value unless you are experiencing difficulties with your device.
• Select the parity that the touch screen uses (the default setting is Even). This
information should be provided by your device's documentation.
96