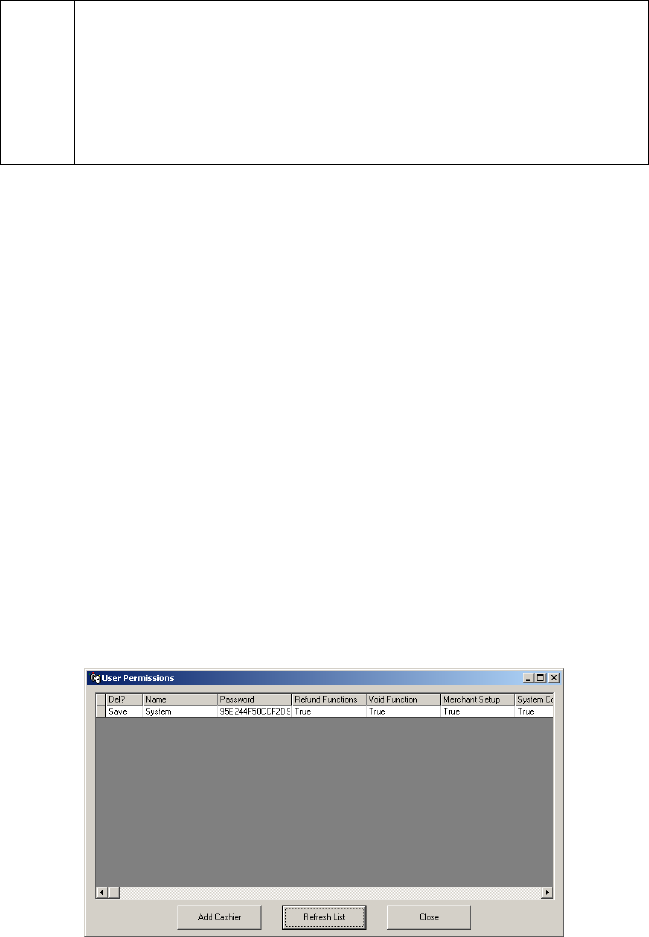
Cashier Privileges Setup
Simple Explanation: PCCharge Payment Server has the ability to
support several "cashiers" accessing PCCharge, each with a configurable level
of access.
If you think you'll be running PCCharge on a single computer with multiple
users accessing that computer, and you want to support different levels of
access, we recommend that you review this section. Otherwise, proceed to the
next section, Remove TID Number (see page 112).
Before you can decide which functions you want to make available to cashiers, you'll need
to understand how to use PCCharge. We recommend that you return to this section after
you've reviewed the section User's Guide (see page 114). In the meantime, you can look
over the functions and abilities listed in this section.
Adding a Cashier
1. Click Setup on the menu bar. Click the Preferences option.
• If you've already created a password for the System user, PCCharge will prompt
you to enter a User Name and Password. Use System for the User Name and
enter whatever Password you entered during PCCharge installation. Click OK.
PCCharge will display the Preferences window. You'll see asterisks in the field
labeled Password for the 'system' user ID. The System user can create
cashiers and edit their passwords. Click the OK button to save your password
and return to the main PCCharge window. Proceed to step 2.
• If you haven't already created a password for the System user, do so now. The
System user can create cashiers and edit their passwords. This password is
case-sensitive, and can contain both letters and numbers. Enter this password
into the field labeled Password for the 'system' user ID. Click the OK button to
save your password and return to the main PCCharge window.
2. Click Setup on the menu bar. Click the Cashier Privileges option.
104


