


5 – Front Panel Operation
56
5 – Making Basic Front Panel Measurements
As shipped from the factory, front panel measurements for the main output (output 1) are calculated from
a total of 2048 readings taken at a 46.8 microsecond sampling rate. The unit alternates between voltage
and current measurements. Therefore, the data acquisition time for a single front panel voltage or current
measurement is about 100 milliseconds. This sampling rate and data acquisition time combined with a
built-in windowing function, reduces errors due to sampling a non-integral number of cycles of a
waveform for frequencies of 25 Hz or greater. Note that the windowing function is less accurate when
measuring output waveforms for frequencies less than 25 Hz, causing the front panel meter to jitter.
There are no trigger controls for front panel measurements. However, you can program both the sampling
rate and the number of data points in each front panel measurement using commands in the Input menu.
With this flexibility, measurement accuracy can be improved for waveforms with frequencies as low as
several Hertz. The sample buffer size may be varied from 1 to 2048 data points in discrete binary values.
The sampling rate may be varied from 15.6 microseconds to 1 second. Values are rounded to the nearest
15.6 microsecond interval. Note that the front panel sample interval and buffer size settings are
independent of the sample interval and buffer size that you program over the GPIB. This is because you
can qualify measurement triggers over the GPIB, which makes the GPIB measurements independent of
the front panel measurements. Refer to chapter 8 for more information about GPIB measurements.
To have the unit turn on with the reconfigured buffer size and sampling rate, save this state in location 0
and set the power-on state to RCL 0. Note that front panel measurements parameters for output 2 are not
programmable. They are fixed at 2048 data points with a 15.6 microsecond sampling rate.
NOTE: If the front panel display indicates OVLD, the output has exceeded the measurement
capability of the instrument. If the front panel display indicates -- -- -- -- -- -- , an GPIB
measurement is in progress.
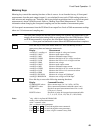
Use the Meter menu for making front panel measurements:
Action Display
1.
On the Function keypad press Meter to access the following measurement
parameters: dc voltage and current
<reading>V <reading>A
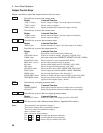
2. To change the front panel time interval and buffer size for output waveform
measurements, press Shift, Input. Then press ( until you obtain the TINT
command. Use the Entry keys to enter a value from 15.6 microseconds to 1
second in seconds. Then press Enter.
TINT 0.002
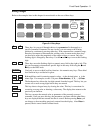
3.
Continue by pressing Shift, Input and ( until you obtain the POINT command.
Press & to select a different buffer size. The choices are: 1, 2, 4, 8, 16, 32, 64,
128, 256, 512, 1024, and 2048. Then press Enter.
One reason to change the front panel time interval and data points is if the
waveform being measured has a period shorter than 3 times the present front
panel acquisition time.
POINT 1024