


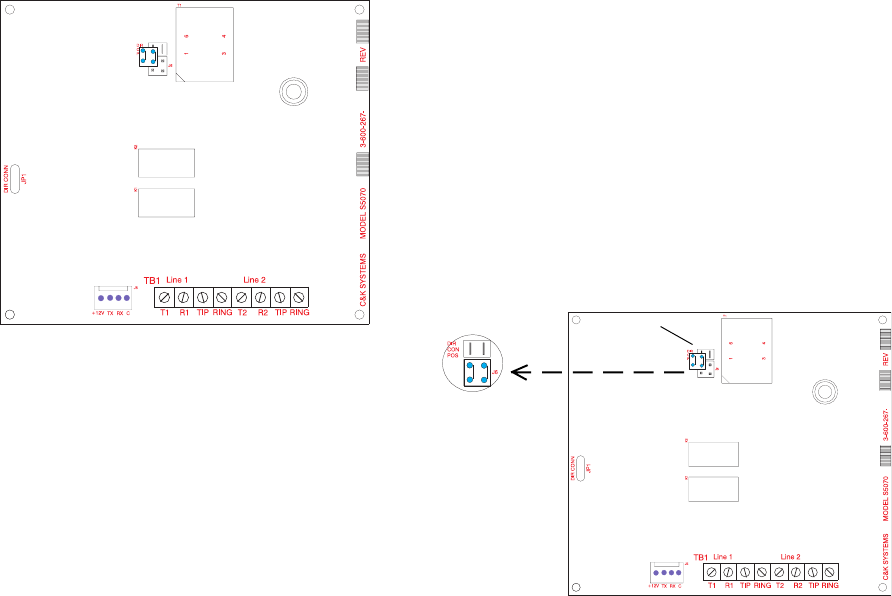
8
Direct Connect
Enabled
Direct Connect
Disabled
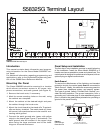
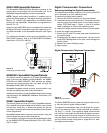
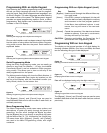
Figure 15
Direct Connect using the S5070SG Digital Communicator
4. Enable the Direct Connect jumper (see Figure 15) and
initiate the Direct Connect function in Commander II.
When you hear the modem tones, momentarily short
the Direct Connect pads located on the left-hand side
of the digital communicator PCB. You should hear the
seize relay energize to indicate connection.
5. Commander II should indicate that the connection has
been established. You are now ready to program the
panel.
6. Be sure to return the jumper to its original position
when the RPS session is completed.
Keypad Activated RPS
The following conditions must be met before starting a
keypad activated RPS session:
1. The RPS Phone Number must be programmed into
Block 4, CL 085 - 100;
2. Keypad RPS Enable (Block 4, CL 106) must be pro-
grammed for Yes (2);
3. RPS/Modem Types (Block 4, CL 107) must match the
configuration of the Commander II software;
4. The phone lines must be connected to the Tip and Ring
terminals on the digital communicator (Line 1 only);
and
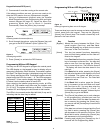
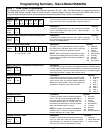
Programming the Panel
The Sierra S5832SG control panel may be programmed
from any keypad connected to the keypad data bus. Con-
nector J8 (see Figure 1) is also available to temporarily con-
nect a keypad, if desired, for programming the panel. The
panel can also be programmed, either remotely or on-site,
using the Commander II software.
The Command Locations used to store the programming
options of the Sierra S5832SG control panel are divided into
10 sections. Each section is called a Block. The configura-
tion of the control panel determines which Blocks are pro-
grammed.
All keypad programming is done from the Installer Program-
ming Mode. To enter the Installer Programming Mode, press
and hold the [1] key for 2 seconds.
When programming with an Alphanumeric keypad, you must
select the appropriate language for your panel, followed by
the [Home] key. The icon and LED keypads do not require
the [Home] key to be pressed. On the LED keypad, all LEDs
are off to indicate that you must enter the installer code.
Next, enter the 6-digit installer code. The default installer
code is [0-1-2-3-4-5]. On the Alphanumeric keypad, press
the [Home] key to use Menu Programming or the [Bypass]
key to use Quick Programming. You are now in installer pro-
gramming mode.
To exit the Installer Programming Mode, press and hold the
[CANCEL] key for 2 seconds. This will exit the programming
mode and reset the panel.
Remote Programming (RPS)
Remote Programming of the Sierra S5832SG control
panel is available with the Commander II software. The
remote programming session can be initiated locally from
the keypad or remotely by the Commander II software.
Setup for Direct Connect to the S5832SG
The procedure for initiating Direct Connect with your
model of Digital Communicator is outlined below.
1. When using Direct Connect, connect the telco cable
from the line side of the modem to the Tip and Ring
terminals on the Digital Communicator (Line 1 only).
2. Move the jumper (J6) to the enabled position, as shown
in Figure 15, below.
3. Start Commander II and open the Panel menu. Select
the Connect option and then click on Direct Connect.
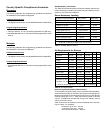
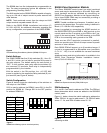
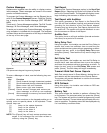
Terminal Connections
Connect the Sierra S5832SG digital communicator to the
telephone line, as shown in Figure 13 (on previous page),
using an approved, 6 or 8 conductor telephone cable (not
included). Connect the cable to the control panel as follows:
Red = Ring Brown = Seized Tip (T1)
Green = Tip Blue & Orange = Tamper
Grey = Seized Ring (R1) Yellow & Black = Not Used
Figure 14
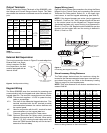
S5070US-2 Dual-line digital communicator
Figure 14, below, shows the layout of the S5070SG-2 dual-
line digital communicator. The terminals for line 2 are la-
belled Tip, Ring, T2, and R2.