


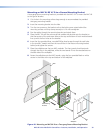

Accessing Covered Panel Features After Mounting
After the MLC is installed in the mounting surface, you can still access the covered
front panel features on the MLC D and the side and rear panel features on the
MLC 62 RS EU and MLC 62 RS MK, using the following procedures.
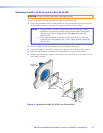
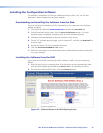
Accessing the Covered MLC D Front Panel Features
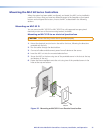
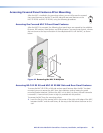
After the MLC D is mounted, the following front panel items are covered by the wallplate:
IR sensor, DIP switches, Reset button, and USB connector. To access these controls, remove
the two screws at the top and bottom of the wallplate and lift it off the MLC, as shown
below.
MLC 62 D
VOLUME
DISPLAY
OFF
ON
MUTE
LAPTOP
VIDEO
PC
Wallplate
Figure 44. Removing the MLC D Wallplate
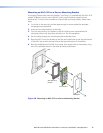
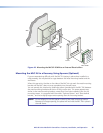
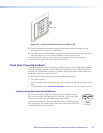
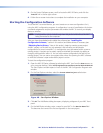
Accessing MLC 62 RS EU and MLC 62 RS MK Side and Rear Panel Features
To access the MLC 62 RS EU or MK side and rear panel features after the MLC has been
mounted, you must remove the MLC from the installation surface, leaving the metal
mounting bracket attached. (Without the MLC unit to hold it in place, the wall frame also
is removed.) A removal tool (shown at right) is provided with the product.
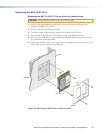
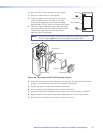
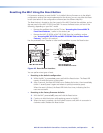
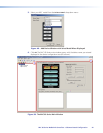
To remove the MLC from the mounting surface:
1. Insert the flat tip of the removal tool in the center of the right or left edge of the MLC,
between the MLC and the wall frame, all the way to the line below the arrow on the
tool.
MLC 60 Series MediaLink Controllers • Features, Installation, and Operation 38