


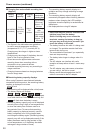
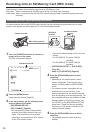

32
1
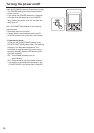
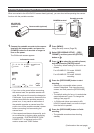
Press the portable recorder’s [POWER]
button for 2 seconds or longer to turn on
the power. (Page 26)
2
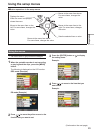
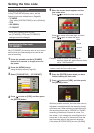
Press the [MENU] button.
Using the setup menus (Page 29)
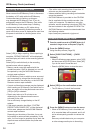
3
Select [DISPLAY SETUP] → [LCD SET] →
[YES], and then press the [ENTER] button.
4
Press to select an item, and then
press the [ENTER] button.
LCD COLOR LEVEL:
Adjusts the color density of
the screen.
LCD BRIGHTNESS: Adjusts the brightness of the
screen.
LCD CONTRAST: Adjusts the contrast of the
screen.
Be careful because if all the LCD monitor •
adjustment values are set to their lowest levels, it
becomes difficult to see the menu screens.
5
Press to set the item value, and then
press the [ENTER] button.
6
Press the [MENU] button to close the menu.
Adjusting the LCD monitor
Slight time errors may occur, so check that the •
time is correct before recording.
When using the recorder overseas, do not set •
the [CLOCK SET] time to the local time, but
instead enter the time difference from Greenwich
Mean Time in [TIME ZONE]. (Page 92)
Setting the date and time/Recharging the built-in battery/Adjusting the LCD monitor (continued)
Recharging the built-in battery
The recorder’s built-in battery saves the date and
time.
When “LOW INTERNAL BATTERY” is displayed
even when the date and time are set, it means
that the built-in battery is low. Recharge using the
following procedure.
Reset the date and time after the battery is fully
recharged.
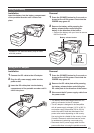
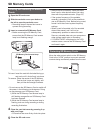
1
Connect the AC adapter to the portable
recorder. (Page 25)
Leave off the power of the portable recorder.•
2
Leave the portable recorder like this for
about 4 hours.
The built-in battery recharges during this •
time.
Check the time code and menu operations •
after recharging.
If the date and time are still not memorized after
recharging, the built-in battery must be replaced.
Consult the place of purchase.