


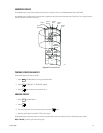
C1519M-E (6/06) 43
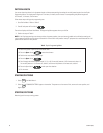
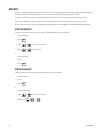
Latching
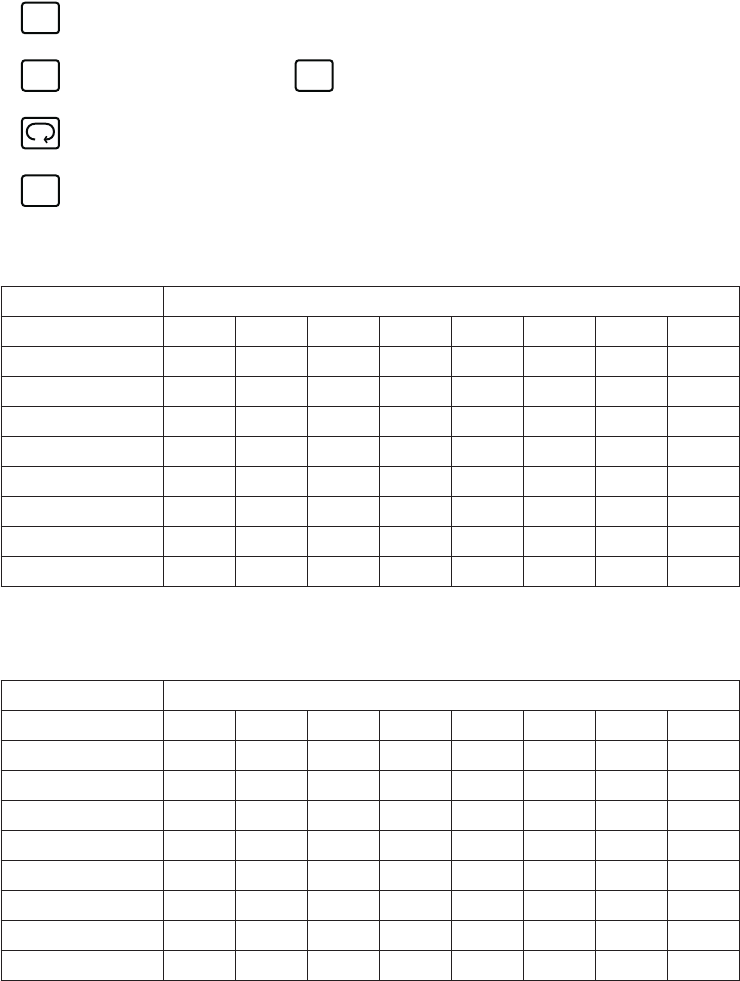
To activate the same relay as latching, follow these steps:
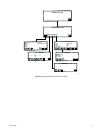
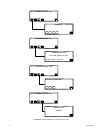
1. Go to Main Menu 1 and enter 1 (GPI).
2. Select to bring up GPI Menu 1.
3. Select so that it is not highlighted. When is not highlighted, any relay you activate latches (remains on).
4. Select . This icon becomes highlighted.
5. Select and then the highlighted auxiliary icon to turn off the latched relay.
I
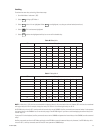
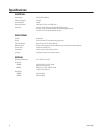
NOTE: In Relay Unit 2, GPI’s 9-16 are associated with the physical relays (1-64) on the back of the unit. However, GPI’s 9-16 are also associated
with logical relays 65-128. For example, the physical relays for GPI 9 are 1-8 and the logical relays are 65-72.
An REL2064 relay unit set for GPI 1 overlaps with the internal relays on the CM6800. Auxiliary commands sent to external relays 1-3 also operate
the internal relays on the CM6800. You can set the relay range of the REL2064 higher if you want to avoid overlapping the external relays with
internal relays 1-3.
If you press F12 on the keyboard, auxiliary commands are sent to the CM6800 and operate the internal relays of the CM6800, as well as external
relays.
Auxiliary commands sent from the GPI Menu go directly to the REL2064 to control the external relays only. However, if an REL2064 relay unit is
not set for GPI 1, auxiliary commands sent from the GPI menu operate the CM6800 relays.
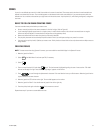
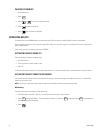
Table W. Relay Unit
GPI Relay Contacts
1 12345678
2 9 10 11 12 13 14 15 16
3 1718192021222324
4 2526272829303132
5 3334353637383940
6 4142434445464748
7 4950515253545556
8 5758596061626364
Associated AUX 12345678
Table X. Relay Unit 2
GPI Relay Contacts
9 6566676869707172
10 73 74 75 76 77 78 79 80
11 81 82 83 84 85 86 87 88
12 89 90 91 92 93 94 95 96
13 97 98 99 100 101 102 103 104
14 105 106 107 108 109 110 111 112
15 113 114 115 116 117 118 119 120
16 121 122 123 124 125 126 127 128
Associated AUX 12345678
GPI
MTRY MTRY
4
MTRY