


C1519M-E (6/06) 37
ZONES
A zone is a user-defined space to which a label is attached and a camera is associated. The camera used at the time the zone boundaries are
defined is associated with the zone. The zone label appears on the selected monitor after zone definition if you move the camera within the
defined zone. You can define and associate up to eight zones with the same camera. A priority level (1-8, with 8 being the highest) is assigned to
each zone.
RULES TO FOLLOW WHEN CREATING ZONES
You must remember these points before you create a zone:
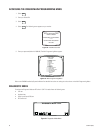
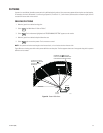
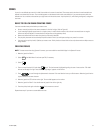
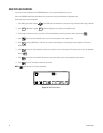
• Always move the joystick so that camera movement is from left to right. Refer to Figure 40.
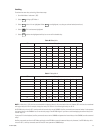
• If you create eight equally spaced zones for a single camera, it would include an entire circle and each zone would cover an angular
distance of about 45 degrees (if camera/receiver configuration and site geometry allow).
• Name each defined zone so that each zone priority can be easily identified.
• Plan physical placement and associated priority levels ahead of time if you anticipate creating many zones for a camera.
• You must assign a priority level (1-8) before you create a zone. Priority levels are hierarchical and are only relevant when multiple zones are
being created.
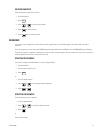
CREATING ZONES
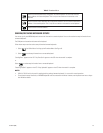
NOTE: To create zones when using Spectra III cameras, you must enable the zone label display in the Spectra III menus.
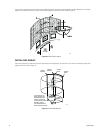
1. Move the joystick to Point A
2. Select from Main Menu 2 and enter your PIN, if necessary.
3. Select .
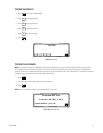
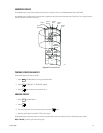
4. Enter a zone priority level (1-8) and select again. The icon becomes highlighted signaling the start of zone creation. “Edit label.
Ack-set for left edge. Pan right. Press 81 & F5 for right edge.” appears on the monitor.
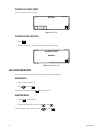
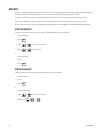
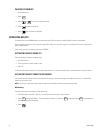
5. Press to scroll through the alphanumeric characters. Each zone label can have up to 20 characters. Move the joystick to the
right to advance to the next character.
6. Move the joystick to SET and then to the right. The zone label appears on the monitor.
7. Move the joystick to Point B. You should move the joystick from left to right only.
8. Enter the priority level again and select . The icon returns to normal.
Repeat these steps if you want to create additional zones.
DEF