


35
Swapping connection destination IP
addresses
When auto IP setting is executed, the remote cameras are linked to the
camera numbers of the unit and become able to be controlled from the
unit.
If the link settings are not as desired, you can use the following
procedure to change the settings as you wish.
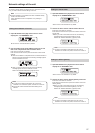
1. Open SWAP IP menu [38] and turn the F1 dial to display
the camera number for which you want to change the
setting.
The IP address set as the connection destination of the
corresponding camera number is displayed on the second line of the
LCD panel.
1.CAM1
192.168.000.001
2. Turn the F2 dial to select the camera (IP address) you
want to set as the connection destination.
When you turn the F2 dial, the IP address indication changes and
the tally lamp of the remote camera with the corresponding IP
address set turns on and the PAN/TILT lever becomes able to be
operated.
Identify the remote camera you want to set while checking the tally
lamp lighting state and video output.
The IP addresses displayed as the connection destinations are
the connection destination IP addresses of the camera numbers
with “Network” set as the connection type in CTRL TYPE menu
[36].
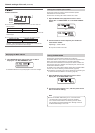
3. Press the F2 dial to confirm the IP address.
The connection destination IP addresses are swapped between the
two camera numbers.
1.CAM1
192.168.000.003
Example:
(1) Original setting
Connection destination IP address of camera number CAM1:
192.168.000.001
Connection destination IP address of camera number CAM3:
192.168.000.003
(2) Open SWAP IP menu [38] and set the connection destination
IP address of camera number CAM1 to 192.168.000.003.
(3) The settings change as shown below and which remote
camera operates when each of the camera numbers is
selected is swapped.
Connection destination IP address of camera number CAM1:
192.168.000.003
Connection destination IP address of camera number CAM3:
192.168.000.001
When SWAP IP menu [38] is open, operation of the camera
selection buttons [CAMERA SELECT/GROUP SELECT] and
camera control (IRIS, FOCUS, ZOOM and CAMERA OSD)
are not possible.
The IP addresses set on the remote cameras are not
changed by this operation.
Notes
Manually setting the connection destination
IP addresses (remote cameras)
Use the following procedure when connecting (via a router) remote
cameras whose IP addresses cannot be set by following the steps in
“Auto IP setting” or to manually configure the link settings for the unit
and remote cameras.
1. Open MANUAL IP menu [39] and turn the F1 dial to
display the camera number for which you want to
change the setting.
1.CAM1
192.168.000.001
2. Use the F2 dial to set the IP address for the connection
destination.
Enter this in four blocks of numerals.
Enter all of the blocks and then press the F2 dial to confirm the IP
address.
The IP addresses can also be set for camera numbers with
“NoAsign” or “Serial” set as the connection type in CTRL TYPE
menu [36].
This is set to the following value by default.
CAM1 : 192.168.000.010
↓
CAM100 : 192.168.000.109
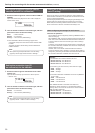
When a connection destination IP address is changed, a check
for IP address duplication is conducted.
If the same IP address is used more than once, the
“IP Duplicate!” message is displayed for 3 seconds.
The settings are reflected as is even if connection destination IP
addresses are duplicated.
1.CAM1
IP Duplicate!
The IP addresses set on the remote cameras are not
changed by this operation.
Note
Settings for connecting with the remote cameras and switcher (continued)