


Clarity User Guide, March 1, 2011 - Rev. 1.06
Page 32
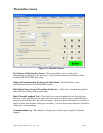
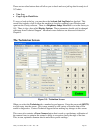
Step 4: Block Position Offsets – The oval calibration template with a Vario block
permanently mounted and the 70mm plano CR39 lens are required for this calibration. This
process places the oval calibration template on the plano lens and takes a snapshot of the
position eight separate times to complete this operation. This will set the horizontal, vertical
and axis position. Select the Calibrate button and, after a few seconds, you will be
prompted to clean the glass plate and make sure no lens is in the chamber. (See Fig. 1.5.)
NOTE
Clean the glass plate using an A/R microfiber cleaning cloth. The glass plate is
removable and it may be necessary to clean the lower LCD under the glass plate. Refer
to the Maintenance chapter for details.
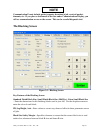
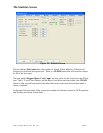
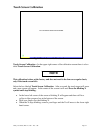
Select OK and the screen will change to the Block Position and Axis Calibration screen.
Select the Calibrate button and the first of eight boxes will appear. The box will direct you
through the operation.
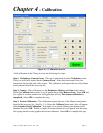
1. Place the plano 70 mm lens (found in the accessory kit) in the blocking chamber.
2. Place a blocking pad on the alignment block. (See Fig. 4.2) The pad must have a hole
in the center to allow the camera to see through the hole on the center of the finishing
block.
3. Mount the alignment block on the blocking arm.
4. Select OK.
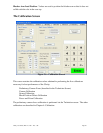
At this time, the machine will place the block on the lens and analyze the data to set the 0, 0
Coordinate Origin position (See Glossary) for X and Y and also set the axis. This calibration
will ask you to perform 1-4 above eight separate times. The software rotates the block 45
degrees each cycle.
Follow the on-screen direction until the calibration is complete. At the end of this calibration
three numbers will appear in the box for:
1. Horizontal offset (X)
2. Vertical offset (Y)
3. Axis (A)
NOTE
Look closely as the block is being placed on the lens. If you believe each of the eight steps were
completed with no block slippage or any irregular motion, then select OK to accept the new
offsets and continue to the power calibration. If you feel that any of the eight steps were
compromised, select Cancel and start the process over.
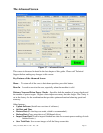
Step 5: Power Calibration – This calibration requires the use of the 70mm CR39 -6.00 and
the 65mm CR39 +6.00 lenses found in the accessory kit. This process will set the power
throughout the range of powers this device is able to verify.