


Clarity User Guide, March 1, 2011 - Rev. 1.06
Page 11
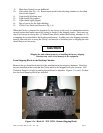
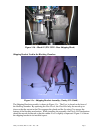
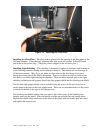
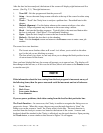
Figure 1.5 – Installing the Glass Plate
Installing the Glass Plate – The glass plate is placed over the opening in the base plate of the
blocking chamber. Clean the glass plate and then slide it into the pocket. It should fit and
seat down in the pocket fully. (The glass plate is shipped in the accessory box.)
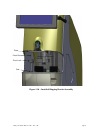
Installing Light Shielding – This shielding is designed to reduce or eliminate light coming in
to the blocking chamber causing inconsistent lens analysis. The shields are not necessary in
all lab environments. Only if you see white or clear areas on the lens image (on screen)
during processing should the shields be needed. They are in the accessory box in the event
that there is too much light entering the chamber. There are three separate parts to the light
shielding including the left gripper shield, the right gripper shield and the blocking arm shield.
The left and right gripper shields can be installed using the screws in the accessory box to
secure them to the tops of the front gripper arms. There are two threaded holes for the screws
to attach the shields to the tops of each gripper arm.
The blocking arm shield requires that you remove the center screw of the blocking arm,
thereby removing the chuck. Place the shield over the arm with the flat side facing down.
Replace the chuck (align small hole on the back of the chuck with the locator pin) and insert
and tighten the center screw.