


CarChip Online Help Printable Version
6
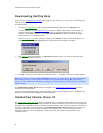
Installing CarChip Software
Follow the steps provided below to install the CarChip software. CarChip software is compatible with
computers running Windows™ 98SE, ME, NT 4.0, 2000, XP, or Vista.
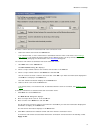
1. Place the CarChip software CD in your CD ROM drive.
2. The install program should start automatically. If the install program does not start, select Run from
the Start menu, type D:\SETUP (or the correct letter for your CD ROM drive), and click OK to begin
the installation.
3. Follow the on-screen prompts to complete the installation.
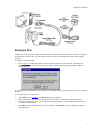
Connecting an Older Model CarChip to a Computer
The older models of the CarChip data logger connect to your computer using a USB connection (# 8211,
8221, 8225, 8241, 8245) or using a serial port connection (# 8210, 8220). See Connecting CarChip Pro to
a Computer if you have a CarChip Pro or CarChip Fleet Pro (# 8226, 8246).
Note: The CarChip data logger does not have to maintain a constant connection with your computer. The
CarChip can be connected and disconnected at any time the CarChip software is not downloading
information from the CarChip data logger.
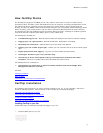
To connect the CarChip data logger to your computer using a USB connector:
1. Locate a free USB port on the front or back of your computer and insert the USB connector of the
download cable into the USB port.
2. Plug the microminiature connector into the port on the CarChip data logger.
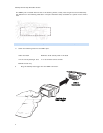
To connect the CarChip data logger to your computer using a serial port:
The following instructions for connecting earlier versions of the CarChip (products # 8210, # 8220) to a
serial port connection:
1. Locate a free serial port on the back of your computer and insert the 9-pin connector of the
download cable into the port.
2. Plug the power adapter cable into the power jack on the 9-pin connector.
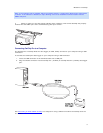
3. Plug the power supply into an AC outlet.
4. Plug the 8-pin microminiature connector into the port on the CarChip data logger.