27
3
Troubleshooting
Introduction
WARNING: SHOCK HAZARD. Most of the troubleshooting procedures given in this chapter are
performed with power applied and protective covers removed. Such maintenance should
be performed only by service trained personnel who are aware of the hazards (for
example, fire and electrical shock).
CAUTION: This instrument uses components which can either be damaged or suffer serious
performance degradation as a result of ESD (electrostatic discharge). Observe the
standard antistatic precautions to avoid damage to the components. An ESD summary is
given in Chapter 1.
This chapter provides troubleshooting and repair information for the dc power supply. Before attempting to
troubleshoot the supply, first check that the problem is with the supply itself and not with an associated
circuit. The verification tests in Chapter 2 enable you to isolate a problem to the dc power supply.
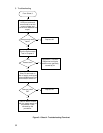
Troubleshooting procedures are provided to isolate a problem to one of the circuit boards. Figure 3-2 shows
the location of the circuit boards and other major components of the unit. Disassembly procedures are
provided at the end of this chapter and should be referred to, as required, in order to gain access to and/or
replace defective components.
If an assembly is defective, replace it and then conduct the verification test given in Chapter 2.
NOTE: Note that when either the A1 Control Board or the A2 Interface Board are replaced, the
supply must be calibrated (See "Post Repair Calibration" later in this chapter). If the A2
Interface Board is replaced, the supply must be initialized before it is calibrated. See
"Initialization" later in this chapter.
Chapter 5 lists all of the replaceable parts for the power supply. Chapter 6 contains block diagrams, test
point measurements, and component location diagrams to aid you in troubleshooting the supply.


