TL-WA7210N
2.4GHz 150Mbps Outdoor Wireless Access Point User Guide
72
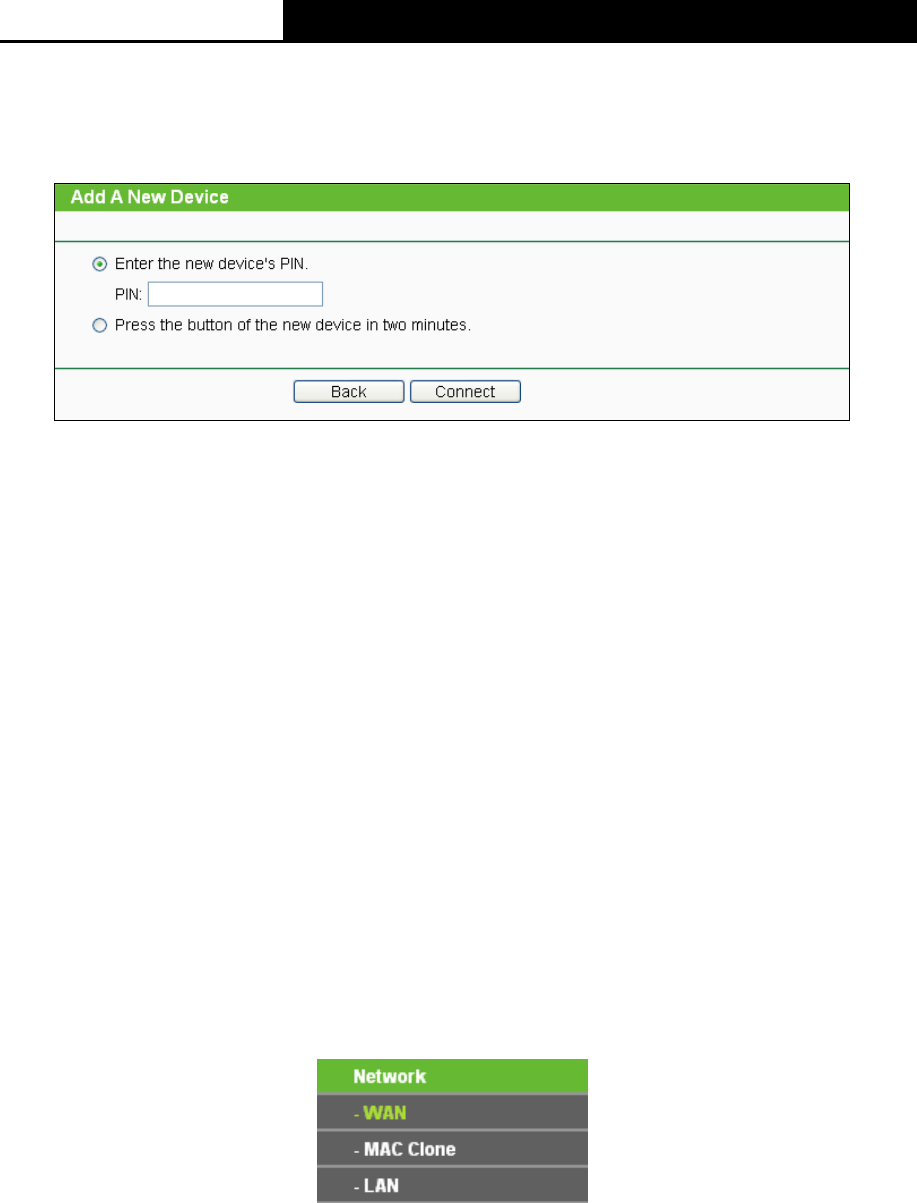
I. Enter the client device’s PIN on the Router
Use this method if your client device has a Wi-Fi Protected Setup PIN number.
Step 1: Keep the default Status as Enabled and click the Add Device button in 错误!未找到
引用源。, then the following screen will appear.
Figure 5-4 Add A New Device
Step 2: Enter the PIN number from the client device in the field on the above WPS screen. Then
click Connect button.
Step 3: “Connect successfully” will appear on the screen of Figure 5-4, which means the client
device has successfully connected to the Router.
II. Enter the Router’s PIN on your client device
Use this method if your client device asks for the Router’s PIN number.
Step 1: On the client device, enter the PIN number listed on the Router’s Wi-Fi Protected Setup
screen. (It is also labeled on the bottom of the Router.)
Step 2: The Wi-Fi Protected Setup LED flashes for two minutes during the Wi-Fi Protected
Setup process.
Step 3: When the WPS LED is on, the client device has successfully connected to the Router.
Step 4: Refer back to your client device or its documentation for further instructions.
5.6 Network
The Network option allows you to customize your local network manually by changing the default
settings of the AP.
There are three submenus under the Network menu (shown in Figure 5-5): LAN, WAN and MAC
Clone. Click any of them, and you will be able to configure the corresponding function. The
detailed explanations for each submenu are provided below.
Figure 5-5 the Network menu
5.6.1 WAN
Choose menu Network > WAN, and then you can configure the IP parameters of the WAN on the
screen below.
There are six WAN connection types: Dynamic IP, Static IP, PPPoE/Russia PPPoE,
BigPond Cable, L2TP/Russia L2TP, and PPTP/Russia PPTP; while there is one more type in AP
Router mode, BigPond Cable.
1. If your ISP is running a DHCP server, select the Dynamic IP option. Then the Device will
automatically get IP parameters from your ISP. You can see the page as follow (Figure 5-6).


