Basic Operations
18
Basic Operations
19
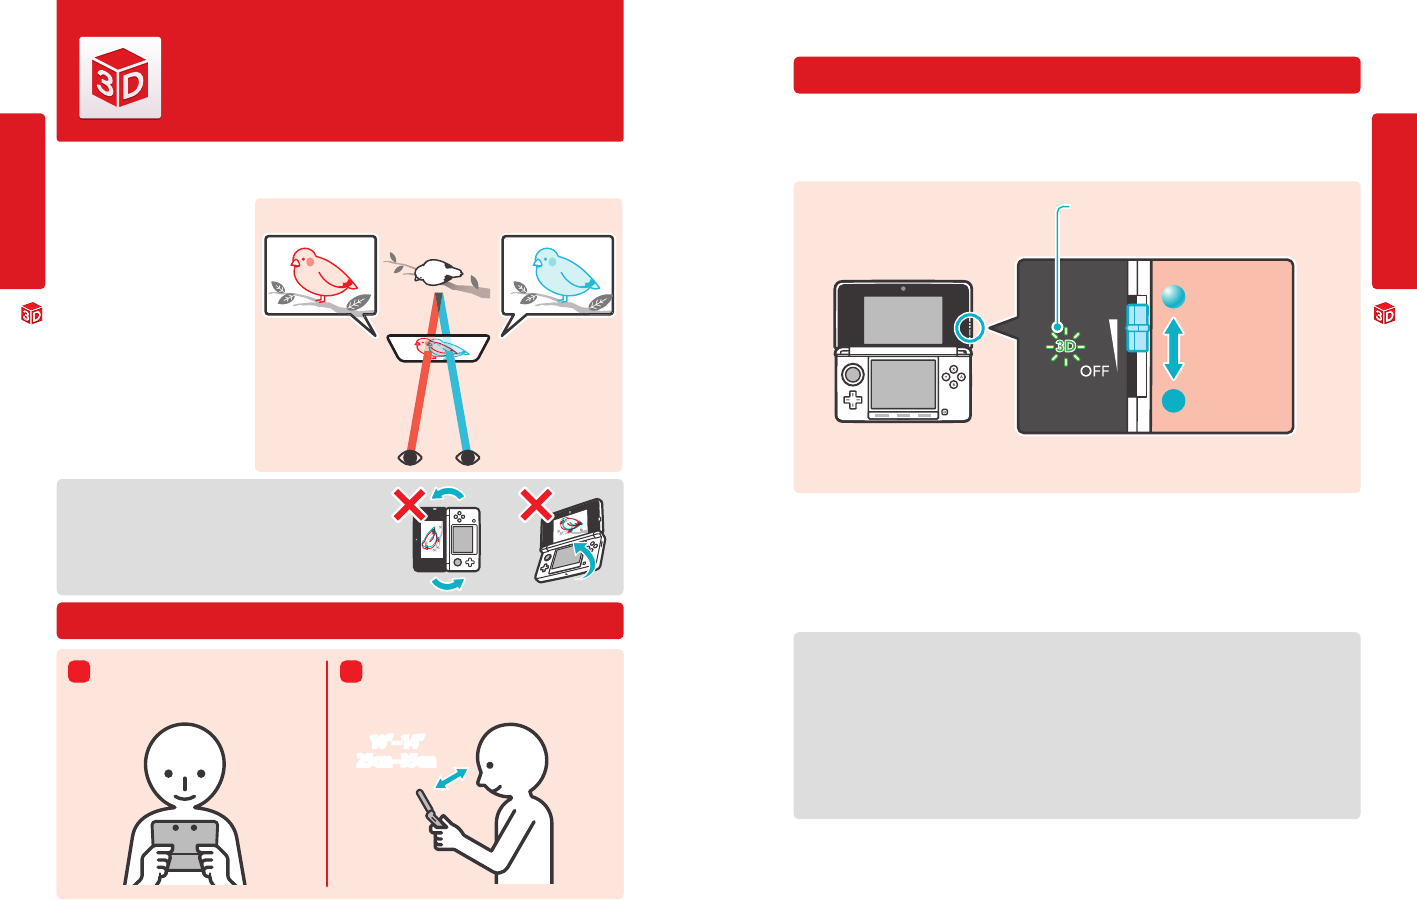
10”–14”
25cm–35cm
3D depth
adjustment
Greater depth
Less depth
Viewing and Adjusting the 3D Image
Viewing and Adjusting the 3D Image
The upper 3D screen allows you to view stereoscopic 3D images. You can adjust the apparent depth of these
images with the 3D depth slider.
The Nintendo 3DS system uses binocular
parallax (the fact that your left and right
eyes are located a short distance apart,
causing them to see dierent images)
to produce 3D images with a feeling
of depth.
If you view the 3D screen from the correct
distance, it displays an image for your left
eye in such a way that only your left eye
can see it, and an image for your right eye
in such a way that only your right eye can
see it. Binocular parallax then allows you
to see 3D depth in the image.
Viewing the 3D screen from a diagonal or tilted position, or
viewing it with the system held vertically, will not produce a 3D
eect. Viewing it this way could cause you to see double images
overlapped or cause the screen to appear black.
To view the best-quality 3D images
Viewing and Adjusting the 3D Image
Adjusting the depth of the 3D images
You can use the 3D depth slider to adjust the apparent depth when viewing 3D images. If it is dicult to view the image with the 3D
slider moved up to the maximum (with the depth set as deep as it will go), try moving the slider to the minimum and then increas-
ing it in small steps until you nd a level where it is easy for you to view the 3D images. Once your eyes are accustomed to 3D images,
you may be able to achieve the best-quality image by moving the 3D slider up.
• If the 3D LED is not lit, moving the 3D slider toward “3D” will not produce a 3D image.
• Some 3D content, such as distributed 3D videos, 3D images, or certain 3D game software, cannot be adjusted with the 3D depth
slider. If this content is dicult or uncomfortable to view, try varying the distance between your eyes and the screen, or turn the
3D eect o by moving the 3D depth slider all the way down to the OFF setting.
• Some software switches between 2D and 3D imagery. With this software, moving the 3D slider does not change the intensity of
the 3D eect.
• It may be dicult to see the 3D eect in locations with strong direct light, such as sunlight.
A note about viewing 3D images
IMPORTANT: The ability to view 3D images may vary from person to person, depending on physical condition,
content of images, and the environment you are viewing them in. A small percentage of people may not be
able to see 3D images at all. If you see double images or have diculty seeing the 3D eect, turn the 3D
eect o with the 3D depth slider and refrain from using it. The 3D feature can also be turned o with Parental
Controls in System Settings - see page 50 for more information.
Be sure to read the Health and Safety information regarding 3D images at the beginning of this manual
(see page 6).
NOTE: You can use Parental Controls to restrict the display of 3D images (see page 50).
Image for left eye Image for right eye
3D image
View the screen from directly in front.
Hold the screen 10 to 14 inches
(25–35 centimeters) from your eyes.
Adjust the distance for the easiest viewing of 3D images.
3D LED
Lights up when 3D images are supported by the software you
are using.
3D depth slider
Move the 3D depth slider down to its lowest position to switch
to 2D (at) display.


