Section 2 – Cabinet Conversion
© 2004 GLOBAL VR
®
, INC.
040-0050-01 Rev. A 10/29/2004 Page 19 of 48
Set Up the Computer
The computer comes pre-loaded with the game software. There is no need to reload the
software with the CDs in the kit. The Software recovery CDs are included in case you have a
software problem in the future or wish to change the specific game titles available.
CAUTION: The computer can be damaged very easily. Use caution when installing
the computer. Avoid touching internal components. These components are susceptible
to Electrostatic Discharge (ESD) damage.
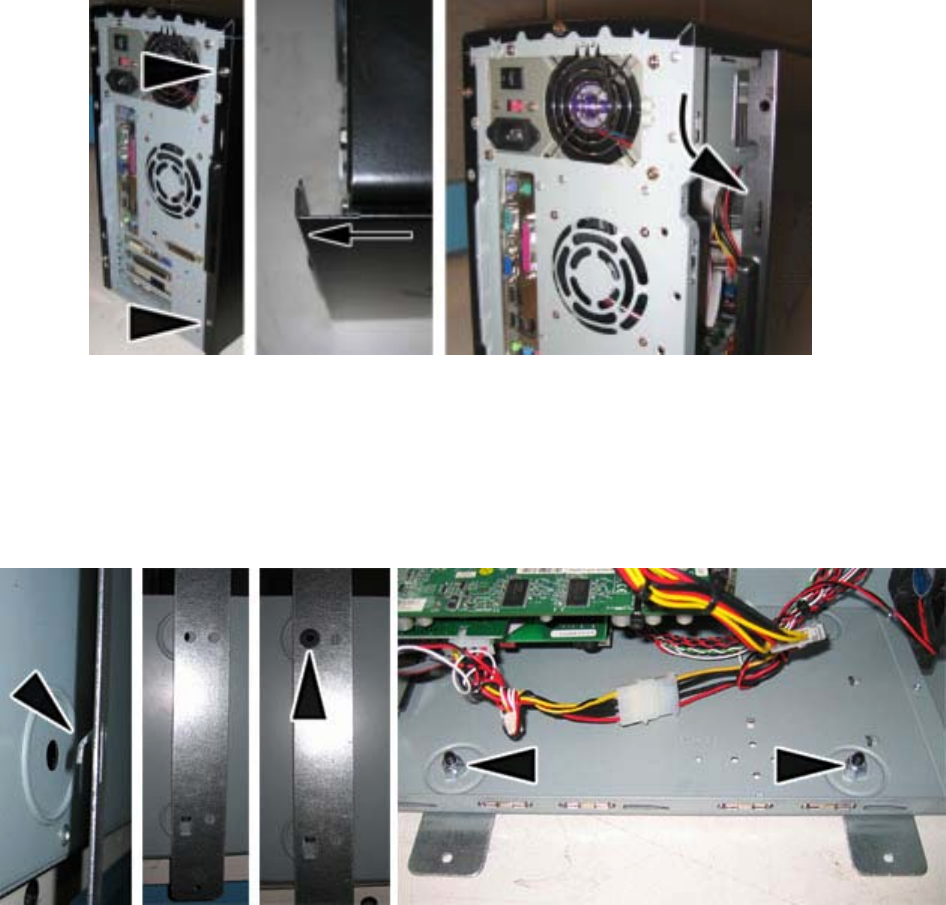
1. Remove the right side panel from the computer by removing the two screws that hold the
panel in place, as shown by the arrows in the picture below. Slide the panel back and
then out to remove it from the computer chassis.
2. Place the computer on its side so you can clearly see the inside of the computer. Place
the metal computer bracket so that the tab is pointed down, and hook the tab into the
bottom mounting hole on the computer, as shown in the picture below.
3. Use the flat-head screw with nylon locking nut to secure the bracket to the top hole of the
computer chassis.
4. Repeat steps 2 and 3 for the second mounting bracket.
5. When finished, the two screws with nuts should be closest to the outside edge of the
computer chassis, with the bracket tabs hooked into the holes closest to the motherboard,
as shown in the last part of the picture above. Re-install the side panel on the computer.
