


–
13
–
HOME AUTOMATION
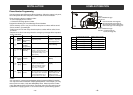
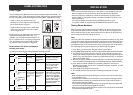
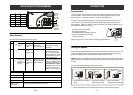
Erase Control Modules
To erase a control module from the control panel, it is similar to learning a
control module, which involves 2 parts.
1. Erase the memory of the control panel
2. Erase the memory of the control module
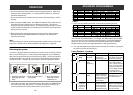
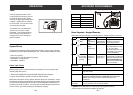
Part 1 Erase the memory of the Control Panel
1
2
3
[PROG]
[MPIN]
Enter
Programming
mode
Enter master
password to
programming mode
3 beeps for valid
password. 1 long beep
for invalid password.
[0]
Select erase
control
module
programming
After [0] is entered, some
zone LEDs will flash or
stay off. The zone LEDs
represent whether that zone
is occupied by any control
module. **See Table F
Select the
control module
location you
would like to
erase
Refer to the table
below to select
the control
module location.
After you have selected the
remote location, you will
hear 3 beeps and verbal
confirmation [Device X
Empty Memory], where
X is the control module
location you have selected.
To erase an
occupied
control module,
press [1] to [5].
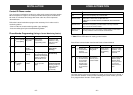
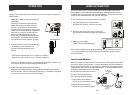
To turn off a light with the control panel:
1. Press the device number button on the control panel, i.e. pressing 1 will turn
off device 1, pressing 2 will turn off device 2.
2. You will hear [Device X Off], where X is the device number.
3. You will also see the PROG LED flashing, indicating the control panel is
sending out the wireless signal to control the specific device.
4. If the receiver receives the signal, the control panel will announce [Device
Off Accepted].
To turn on a light with the control panel:
1. Press the number below the device number that you would like to turn on, i.e.
pressing 6 will turn on device 1, pressing 7 will turn on device 2.
2. You will hear [Device X On], where X is the device number.
3. You will also see the PROG LED flashing, indicating the control panel is
sending out the wireless signal to control the specific device.
4. If the receiver receives the signal, the control panel will announce [Device
On Accepted].
Operation
Step Keys Function Description Note
–
40
–
INSTALLATION
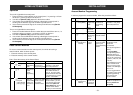
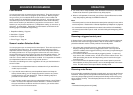
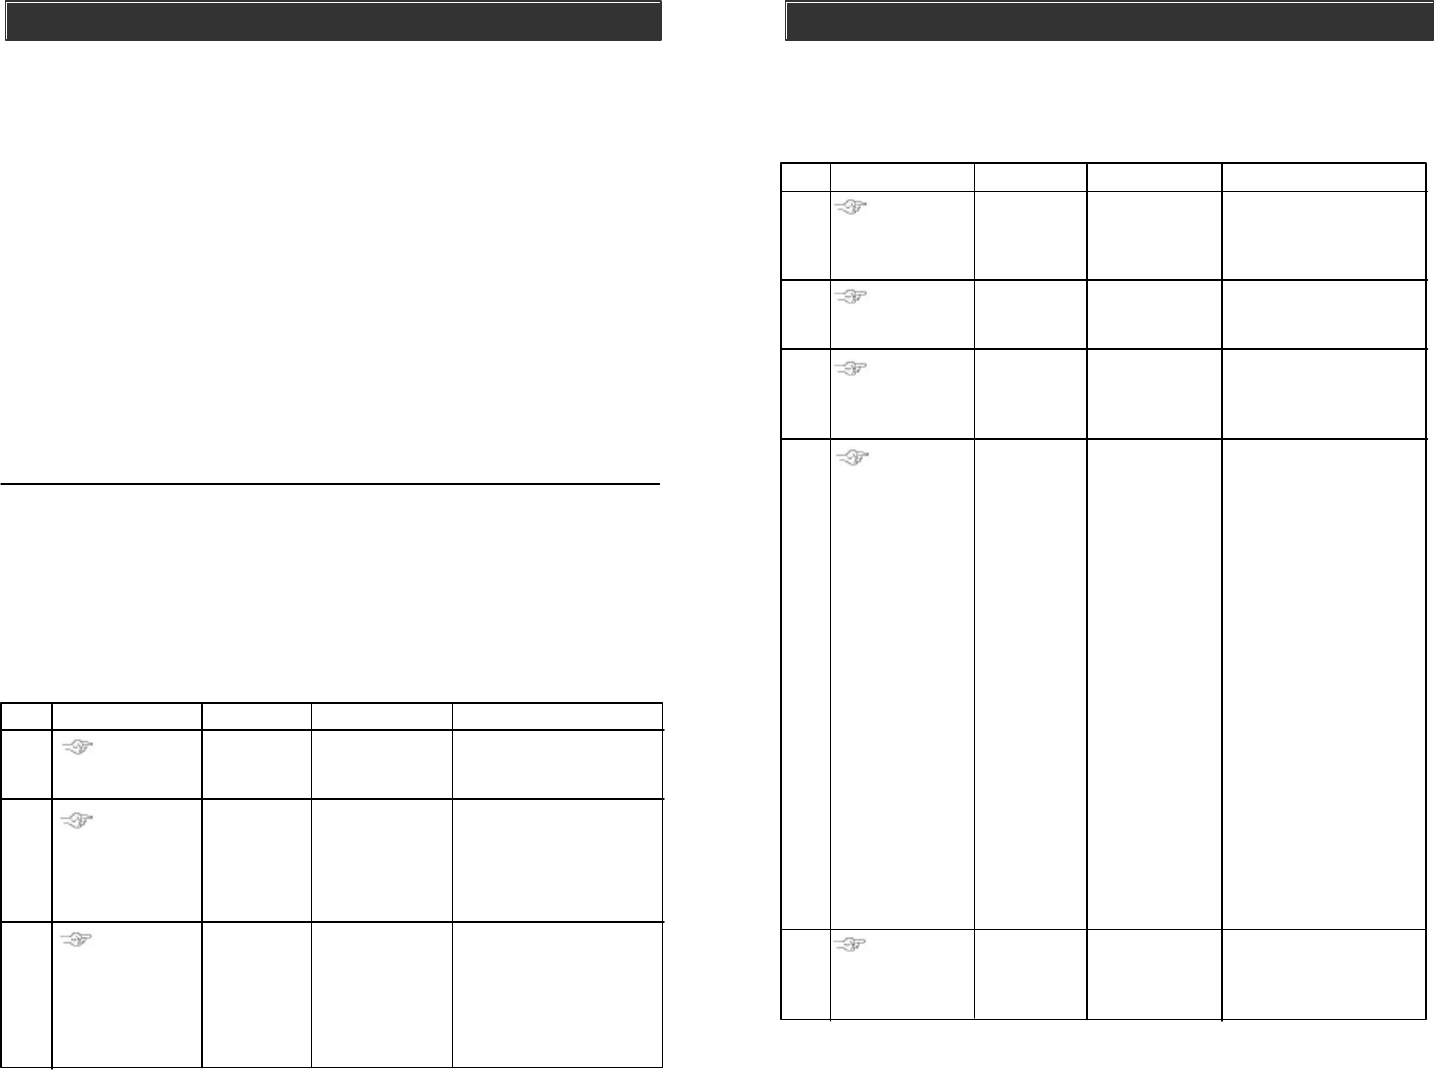
Account Number Programming
In order to program the account number, follow the procedures follow:
Press [PROG]
Press [MPIN]
Enter
Programming
mode
Press [2]
Enter master
password to
programming
mode
3 beeps for valid
password. 1 long beep
for invalid password.
Select
password
programming
Press [0]
Select to
add / change
account
number
[0] = Add/change
account number
Step Keys Function Description Note
4
3
2
1
Enter [New 4-
digit Account
Number]
This number can be a
combination of 0-9,
B,C,D,E & F.
To enter 0-9:
Enter by the keypad 0-9
directly.
To enter B,C,D,E,F:
Press [STATUS] and the
ARM light will stay on.
Then press the following
keys for the correspond-
ing letters (1=B, 2=C, 3=D,
4=E, 5=F).
Press [STATUS] to return
back to number-mode
when you want to input
numbers. The ARM light
will turn off.
You can toggle between
the number or letter mode
by pressing [STATUS]
when entering the
account number.
Enter the 4-digit
account number
given by the
central monitoring
station.
Enter new
account
number
Enter [New 4-
digit Account
Number]
5
3 beeps if new account
number is accepted. You
will hear [Password
Accepted]
Enter the new
account num-
ber again for
confirmation