


58 59
Using Software
Using Software
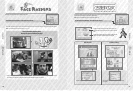
Taking Photos and Videos
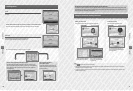
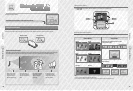
Nintendo 3DS Camera
Take photos and videos in full 3D!
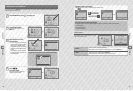
Right eye photo Left eye photo
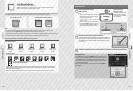
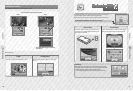
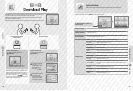
Taking a photo / video
while too close to the
subject will result in a
blurred or double image.
The closer the subject is
when you take the photo /
video, the stronger the 3D
eect.
One metre is the optimal
distance for 3D photos /
videos and will give a
vivid image.
Having objects far away
in the background while
taking a photo / video will
add to the 3D eect.
The two cameras mounted on the exterior of the system are used to take 3D photos. Each camera takes one photo: the left camera takes one for
the left eye, and the right camera for the right eye. These photos are then combined and appear in 3D on the 3D Screen (page 32).
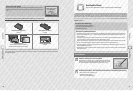
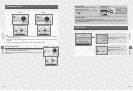
Tips for the best 3D visuals
Ensure that you leave a minimum of 30 cm between the subject and the Nintendo 3DS XL system when taking photos / videos. Getting too
close to the subject will cause it to become blurred and out of focus, and can result in a blurred photo / video with a double image.
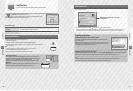
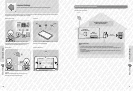
Nintendo 3DS Camera
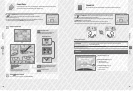
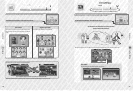
Camera Modes Video Modes
Taking Photos / Videos
Touch / or press L Button / R Button / A Button to take a picture or start recording video.
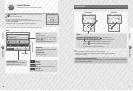
Nintendo 3DS Camera Features
Nintendo 3DS Camera contains a number of features to ensure you make the most unique creations possible!
Sparkle Merge
Dream Pinhole
Low-light Mystery
Frame Pick (take multiple photos to create
a stop-motion video)
Clip Link (record several segments and link
them together)
Note:
t
You can use the Low-light camera mode when taking videos.
t
There are also other features not listed here, such as crosshairs, a timer, brightness and contrast adjustment, etc.
For detailed controls information, consult the electronic manual.