40 41
Using Software
Using Software
Adjusting Brightness / Power-Saving Mode
Taking Photos
Close manual
Darker Brighter
Change the font size
HOME Menu
If a software title includes an electronic manual, the MANUAL option will be displayed when you
select its icon. Touch this to view the manual. Manuals can be viewed while a software title is
suspended.
Viewing manuals
Choose an item from the contents
Slide up and down to scroll through the contents of the
manual and touch the page you want to view.
Note: Press the Y Button to change the language of the
manual.
Touch on the HOME Menu to display the brightness settings.
Screen brightness
Touch a number to change the brightness level.
View the page
Slide up and down to scroll through the contents of the
page. Slide left and right to switch pages.
Electronic Manuals
Power-saving mode
Enabling this mode will automatically adjust the brightness of the screen depending on what is being displayed in order to conserve battery
power. Disabling it ensures that you can maintain a constant brightness level, but results in shorter continuous play time. This function is
set to o by default.
Press and hold START, then press the following:
Up: Increase brightness
Down: Decrease brightness
Left: Disable power-saving mode
Right: Enable power-saving mode
HOME Menu
Brightness levels and battery life
Increasing screen brightness will decrease battery life, and vice versa. Please bear this in mind when you adjust your brightness settings
(page 31).
Note: Because brighter screen settings require more power, the power LED may change from blue to red. If the battery is nearly empty, the system
may turn o suddenly.
Brightness settings and power-saving mode with Nintendo DS / Nintendo DSi software titles
Nintendo DS / Nintendo DSi software titles cannot access the HOME Menu. Press the HOME Button to pause the software, then use the
following commands to adjust brightness and power-saving mode settings.
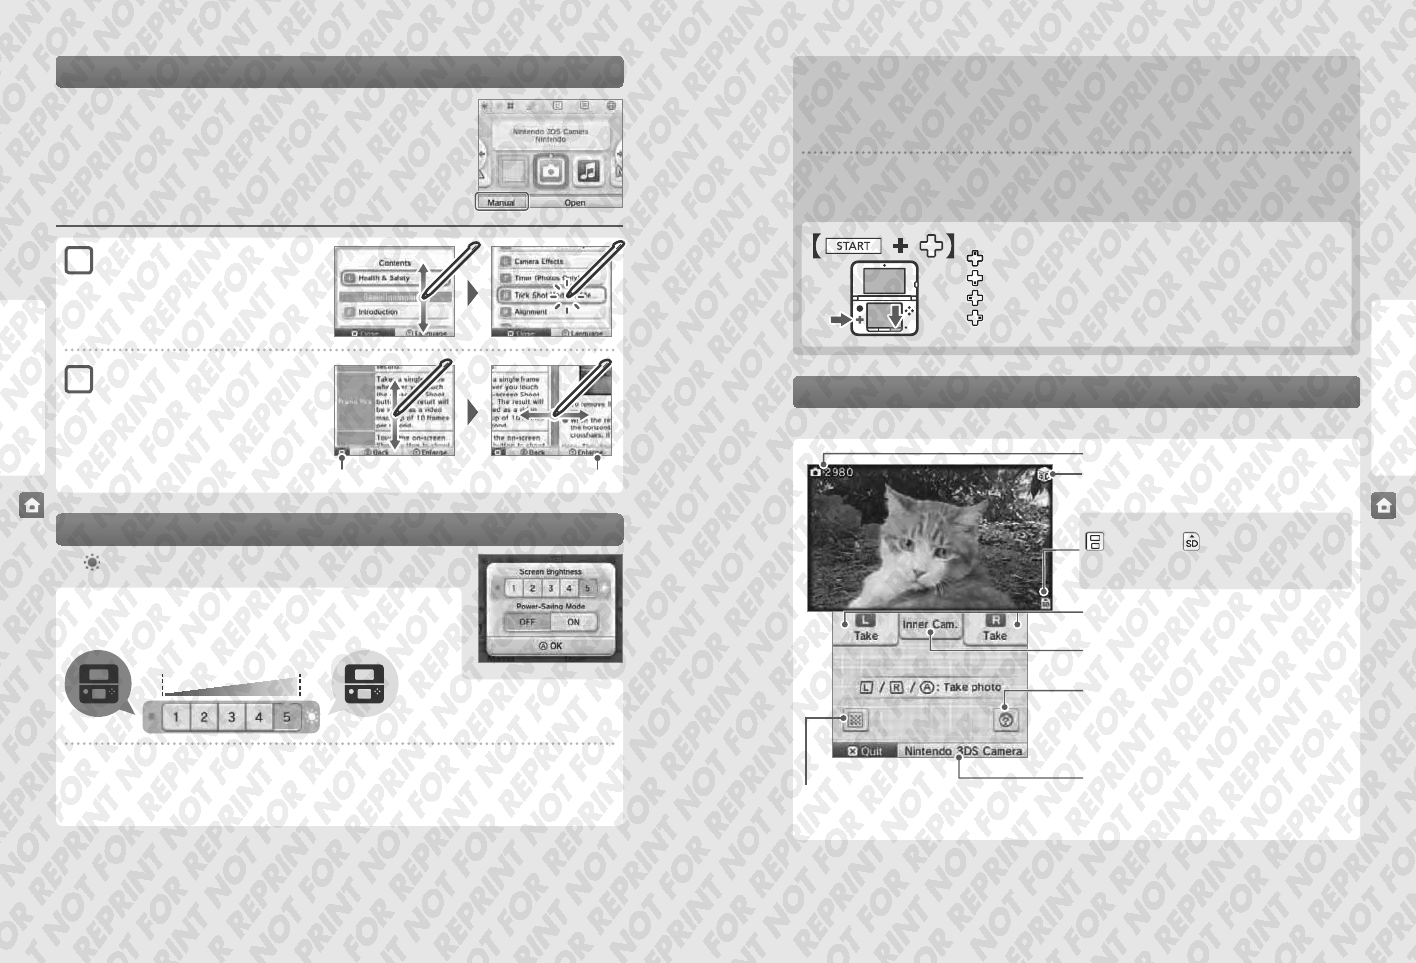
Press the L Button or R Button on the HOME Menu to switch to camera mode.
Photos remaining
3D Icon
Indicates the outer cameras are in use
Storage Location
System Memory SD Card
Note: Choose the save destination in the Settings for
Nintendo 3DS Camera.
Take photo
(or press L Button / R Button / A Button)
Switch between inner / outer cameras
Only the outer cameras can take 3D photos
Merge
Use the inner and outer cameras simultaneously to take photos of two
faces and merge them together into one. For more details, refer to the
Nintendo 3DS Camera electronic manual.
Open Nintendo 3DS Camera (Page 58)
Read QR Code
If you point the camera at a QR Code for Nintendo eShop or a QR Code with a website URL, you can go directly to the relevant page in Nintendo eShop
or the internet browser (page 56).
Note: Photos you’ve taken can be viewed in Nintendo 3DS Camera (page 60).
1
2


