


How to Use the NMS200
26
ProSafe NMS200 Network Management System
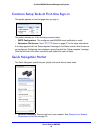
Follow these steps to start discovering equipment on your network.
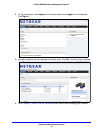
1. Click Resource Discovery in Quick Navigation or right-click the Discovery Profiles list
and select New. (If you have previously exported profiles, you can Import them. You can
also Export Selection, or Export all profiles in this manager. Open an existing profile to
edit it.)
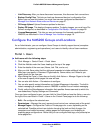
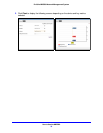
2. After this beginning, if you clicked Resource Discovery, the Quick Discovery screen
appears where you can enter device identifiers (typically IP Address(es)), and
authentications, then execute discovery. The Quick Discovery screen can also discover the
default Discovery profile if you have configured one already.
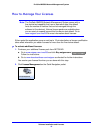
If you clicked New in the Discovery portlet, the Discovery Profile Editor appears, with a
step-by-step set of screens to configure resource discovery, as described below.
You can navigate through the Profile Editor by clicking the screen tab names at the top, or
by clicking the Next button at the bottom of the page.
Discovery Profile Editor
Use this editor to configure discovery. Baseline discovery is the initial discovery to compare to
later discoveries. Follow these steps to discover equipment on your network:
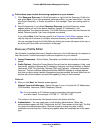
3. General Parameters — Set the Name, Description and whether this profile is the baseline
default.
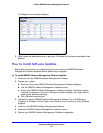
4. Profile Options — Select the Device Naming Format (how the device appears in lists, once
discovered), whether to Manage by IP address or hostname, and check whether to Resolve
Hostnames, ICMP Ping Device(s), Manage ICMP-only Device(s), or Manage Unclassified
Device(s). This last checkbox determines whether NMS200 attempts to manage devices
that have no device driver installed. Management may be possible, but more limited than for
devices with drivers installed, provided this capability is one you have licensed.
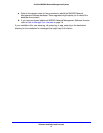
Network
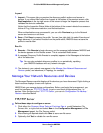
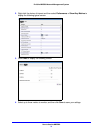
5. After you click Next, the Network screen appears.
Network Type and Addresses — Select the type of entry in the pick list (IP Address(es),
CIDR Address, Hostname, SNMP Broadcast, Subnet).
Tip: You can specify an IP Address range by separating the beginning and
end with a dash. For example: 192.168.1.1 - 192.168.1.240.
The tooltips in the data entry field describe what valid entries look like.
6. Authentication — You can create new, or add existing authentications. Notice that
authentications appear with Edit / Delete icons and Up / Down arrows on their right. The Edit
icon opens the authentication editor. Click the arrows to arrange the order in which
credentials are tried (top first). Ordering only applies when two credentials are of the same
type.