


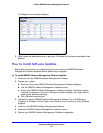


How to Use the NMS200
24
ProSafe NMS200 Network Management System
• Link Discovery. After you have discovered resources, this discovers their connections.
• Backup Config Files. This lets you back up discovered devices’ configuration files.
Before you can use this feature, you must have servers configured as described in
Manage Your Network Resources and Devices on page 27.
• OS Image Upload. Upload firmware updates for devices.
• Deploy OS Image. This deploys firmware updates. To deploy images, you must have File
Servers configured, as described in
Configuration File Backup / Restore on page 28.
• License Management . This lets you see and manage the licensed capabilities of
NMS200, as described in
How to Manage Your Licenses on page 19.
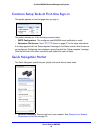
Configure the NMS200 Groups and Locations
As an Administrator, you can configure Users Groups to identify support teams (examples:
administration, engineering and operations), and users to identify roles of team members.
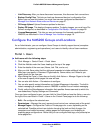
Portal > Users
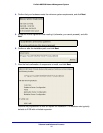
Add users with the following steps:
1. Click Manage > Control Panel > Portal Users.
2. Click the Add tab under the Users heading at the top of the page.
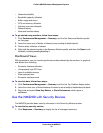
3. Enter the details of the new user (Name, Job Title, and so on).
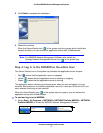
4. After you click Save notice that the right panel expands to include additional information.
Make sure you specify a Password. Organizations, Communities, and Roles let you
specify those for the new user.
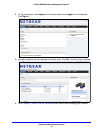
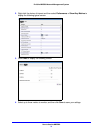
5. After clicking the Portal > Users item on the left, click Actions > Manage Pages to the right
of the user to specify which pages this user will see.
6. You can also click Action > Permissions to configure
7. You can also specify contact information and Instant Messenger information. The built-in
instant messaging is available to users in NMS200 in addition to such instant messaging.
8. Finally, notice the Miscellaneous information that specifies Announcements to which this
user subscribes, Display Settings and Comments.
Once you have configured a user, you can click the View All tab and use the Action > menu to
the right of the user listed in Portal
> Users on the Control Panel page to do the following:
• Edit — Re-configure the selected user.
• Permissions — Manage the user’s access to and control over various parts of the portal.
• Manage Pages — Configure the Public or Private pages for a user, depending on the
selected tab. Possible actions here include changing the look and feel of pages (for
computers and mobile browsers), adding pages and child pages, and importing or
exporting page configurations. Notice that you can configure meta tags, and javascript on
these pages too.