17WPMAN0141 (8/31/01)
Blade Installation (Figure 10)
CAUTION
J Your dealer can supply genuine re-
placement blades. Substitute blades may
not meet original equipment specifica-
tions and may be dangerous.
Install spindle lock wrench (1) onto spindle pulley as
shown. Install shoulder washer (3) (if removed), small
end up. Make sure blade cutting edge is positioned to
lead in clockwise rotation, as viewed from top of
mower.
Excessive blade slipping can cause cup washers to
burn and lose their clamping force. Inspect cup
washers to determine if they are burned or have lost
their clamping force. Replace as necessary.
IMPORTANT
J We recommend you install a new
Nylok blade bolt when you replace the
blade.
Install two cup washers (6), washer (5) and blade (4)
on cap screw. Install cap screw and blade assembly
into spindle. Torque cap screw to 170 lbs.-ft. Remove
blade wrench from pulley. Replace belt shields.
IMPORTANT
J Do not substitute any bolt for the
special blade bolt. It is self-locking, meet-
ing the non -loosening requirements for
this application.
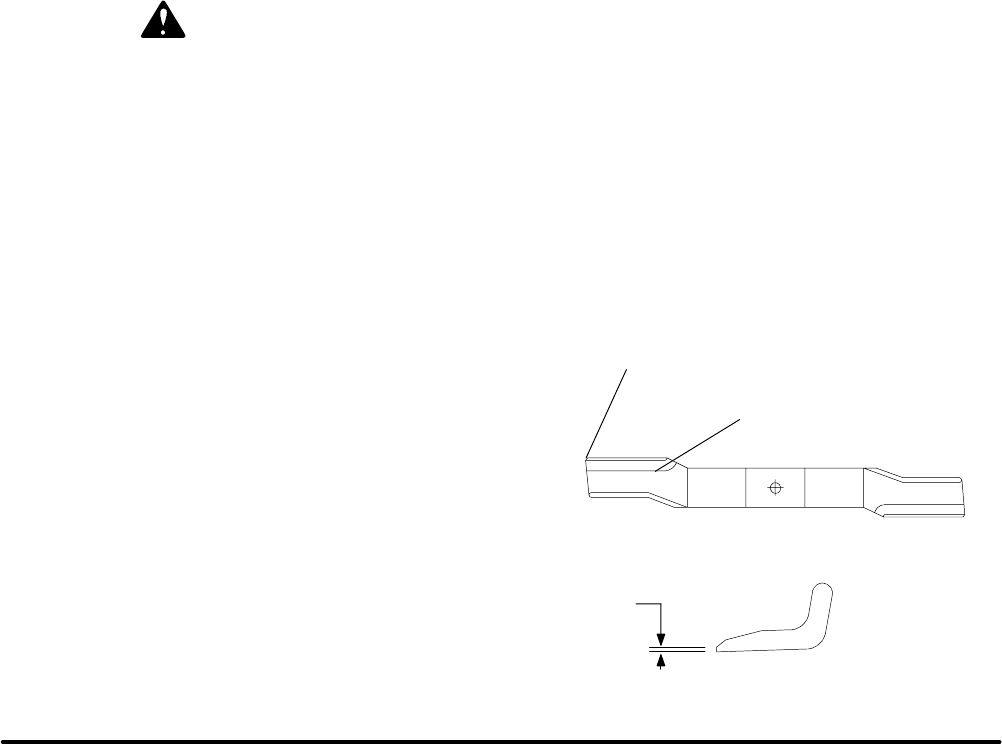
Blade Sharpening (Figure 11)
Remove blades.
Always sharpen both ends at the same time to
maintain balance. Follow original sharpening pattern.
Do not sharpen blade to a razor edge. Leave from
1/32” to 1/16” blunt edge. Do not sharpen back side.
IMPORTANT
J When sharpening blades, be sure to
balance them. Unbalanced blades will
cause excessive vibration which can dam-
age blade spindle bearings. Vibration may
also cause structural cracks in mower
components.
MAINTAIN CORNER
FOLLOW ORIGINAL
PATTERN
1/32″
CD3627
Figure 11. Blade Sharpening
NOTES


