


9-14
Cisco Wireless LAN Controller Configuration Guide
OL-9141-03
Chapter 9 Managing User Accounts
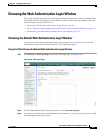
Choosing the Web Authentication Login Window
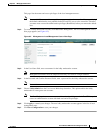
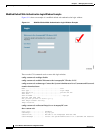
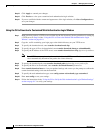
Step 5 Click Add Web Server. This server now appears in the list of external web servers.
Step 6 Click Apply to commit your changes.
Step 7 If you are satisfied with the content and appearance of the login window, click Save Configuration to
save your changes.
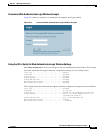
Using the CLI to Choose a Customized Web Authentication Login Window from an External Web
Server
Step 1 To specify the web authentication type, enter this command:
config custom-web webauth_type external.
Step 2 To specify the URL of the customized web authentication login window on your web server, enter this
command:
config custom-web ext-webauth-url url
You can enter up to 252 characters for the URL.
Step 3 To specify the IP address of your web server, enter this command:
config custom-web ext-webserver {add | delete} server_IP_address
Step 4 Enter save config to save your settings.
Step 5 Follow the instructions in the “Using the CLI to Verify the Web Authentication Login Window Settings”
section on page 9-17 to verify your settings.
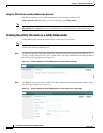
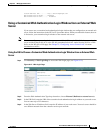
Downloading a Customized Web Authentication Login Window
You can compress the page and image files used for displaying a web authentication login window into
a tar file for download to a controller. These files are known as the webauth bundle. The maximum
allowed size of the files in their uncompressed state is 1 MB.
When the .tar file is downloaded from a
local TFTP server, it enters the controller’s file system as an untarred file.
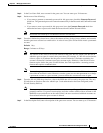
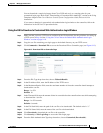
Follow these guidelines when preparing the customized login window:
• Name the login page “login.html.” The controller prepares the web authentication URL based on this
name. If the does not find this file after the webauth bundle has been untarred, the bundle is
discarded, and an error message appears.
• Include input fields for both a username and password.
• Retain the redirect URL as a hidden input item after extracting from the original URL.
• Extract and set the action URL in the page from the original URL.
• Include scripts to decode the return status code.
• Make sure that all paths used in the main page (to refer to images, for example) are of relative type.