


• If you select “Momentary”, the shift function will only be in
effect while you hold the button down. If you select “Toggle”,
pressing the shift button will start the programmed shift state
and the controller will remain in that shift state until the shift
button is pressed again.
• Once the button is assigned as a shift key, you must go to
the corresponding shift window to assign the functions in
that shift state.
• You can view different shift state windows by clicking on the red,
green, or blue arrows in the toolbar at the top. You can return to
the original window by clicking on the “SpeedPad” icon.
• Once you are in the different shift state windows, you can remap
keys, create macros, and reprogram axes just as you did in the
original shift state.
• Save your work.
• Through use of these shift states, you can quadruple the
programmability of each Nostromo game device. This will also
allow you quick access to many functions during games while
giving you the flexibility of assigning shift keys to any position
on your Nostromo controller.
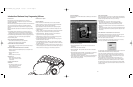
“Signing” and Sharing Your Profile
In the “Profile Editor” toolbar, the
icon between the question mark
and the “Loadout Manager” icon
is the “Profile Properties” window.
Click on that to get a window
similar to this:
By filling in this window, you
get something similar to a name
tag for your profile. You can
have the profile identified as
yours, including your comments,
e-mail address, etc. for the
Nostromo community.
Once your profile is saved and
identified, you can submit it to the
Belkin Nostromo team by e-mailing the profile in an e-mail attachment
to nostromoprofiles@belkin.com for inclusion on the Belkin
website. This way, you can have your unique profile and/or loadout
file made available to other users of Nostromo game devices
throughout the world.
When you are finished creating or editing your profiles, left-click
on the “File” menu on the toolbar and select “Save”.
Your profile is saved in C:\Program Files\Belkin\Nostromo\Profiles.
If you installed to a directory other than C:\ProgramFiles\Belkin\Nostromo,
then the profile is saved in YourInstallDirectory\Profiles.
Uploading and Downloading Profiles
Please submit any profiles you create for addition to the profile
list at belkin.com. To submit a profile, please send it as an e-mail
attachment to nostromoprofiles@belkin.com.
To download profiles, go to belkin.com/nostromo and
click on “Downloads”.
USING THE PROFILE THE LOADOUT MANAGER
The Loadout Manager is responsible for “programming” the game
controllers with profiles. The Loadout Manager can be used in two
modes: manual and automatic.
A loadout is a set of a profiles that are assigned to the Nostromo
game controllers on your system (one profile for each controller),
and an associated game (or really any application). Loading that
game causes the Loadout Manager to automatically load the profiles
you’ve set up. This conveniently enables you to create profiles that
will be associated with each game you play. The system will
automatically load those profiles for you as you start up each game.
Loadouts are built with the Loadout Manager. You assign a profile for
each controller, and select a game to associate with the set of profiles.
Manual Mode – Manual Mode is the simplest way to use the Loadout
Manager. In this mode, you directly select profiles for controllers.
You simply open the activator window and select a profile for each
controller it shows.
Automatic Mode – In Automatic Mode, you set up a loadout for
each game. The Loadout Manager then waits for that game to start.
When it does, the Loadout Manager loads all the profiles associated
with that loadout.
Automatic Mode has a complex initial setup, but once that is done,
you never need to think about it again. Simply launch the game you
want to play and the Loadout Manager makes sure the controllers
are configured the way you want them to be.
LOAD THE PROFILE YOU JUST MADE
After making a profile, you will need to activate it with a game in
the Loadout Manager. To do this, you simply select the controller,
the profile, and the game executable file. Then you can easily
launch the game from within the Loadout Manager.
Open the Loadout Manager.
If the Loadout Manager is currently running, there will be an icon in the
system tray on the right side of the taskbar at the bottom of the desktop:
If the Loadout Manager is not running, you can start it from the
“Start” menu: Start->Programs->Nostromo->Loadout Manager.
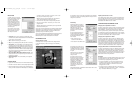
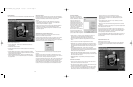
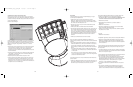
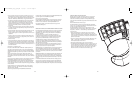
• Find the controller you want to load the profile for in the list
shown. If you have more than one of a type of controller, and it’s
not obvious which entry on the screen represents which controller,
simply press a couple of buttons on the controller and the image
representing that particular one will light up.
• Click on the profile button for that controller. Select “Load Profile…”
from the menu. This will bring up the typical file selection window.
• Find the profile you want, select it, and click “OK”.
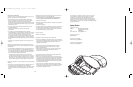
• On the right half of the Loadout Manager, click “Browse” to
select the executable (.exe) file of the game you want to play.
You can do this by selecting the shortcut for the game on your
desktop if you have one there. If you do not, you can find the file
in the directory where you installed your game.
6 7
P73877-F8GFPC001_n50_t_man.qxd 11/13/01 1:15 PM Page 8