Component Replacement: Chilled Water Valve
42 InfraStruXure InRow RC Service
Install the new valve
1. Install the new valve using the existing pipe unions and tighten.
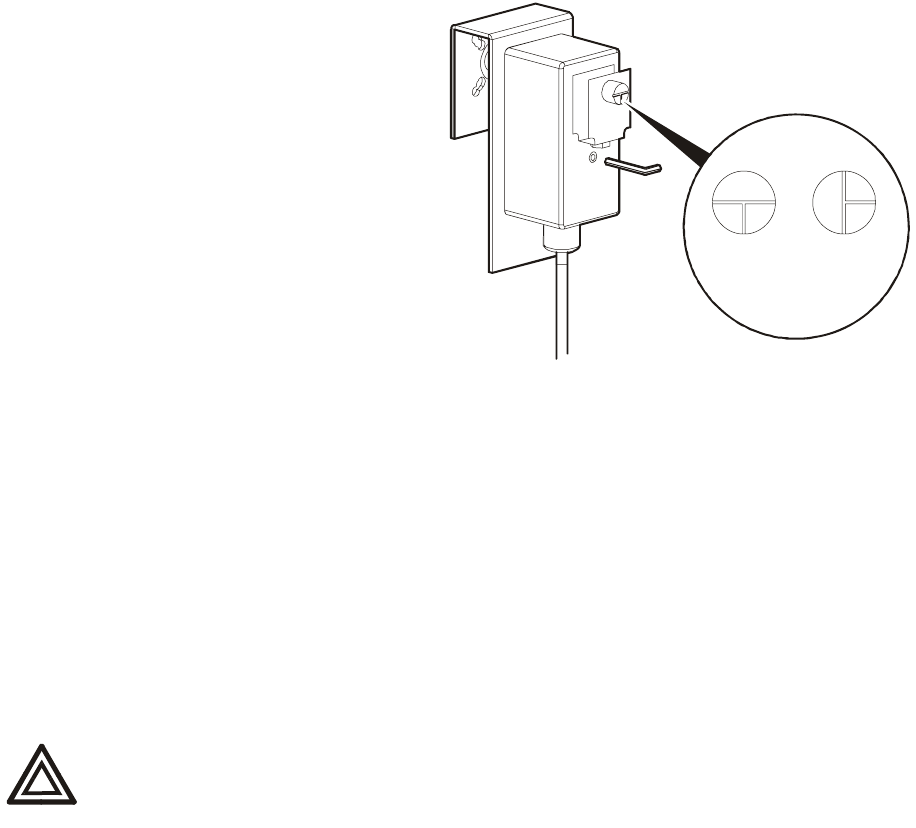
2. Replace the valve actuator and bracket
make sure that the “T” indicator on the
valve shaft is in the same orientation as
the “T” on the valve itself. Tighten the set
screw to 60 in·lb (6.7 N·m) of torque.
3. Use an Allen wrench to rotate the 3-way
valve actuator to the full cool position.
4. Open slightly the bottom coil vent
schraeder.
5. To pressurize the piping, open the return
water valve at the CDU or in the external
piping, depending on your configuration.
6. Air will begin to bleed from the coil vents.
Close the bottom coil vent when you see a
small stream of water. Continue to bleed the air from the top coil vent until you see a small stream of
water there as well, then tighten and close the vent.
7. Once the air is bled from the system and the vents are closed tightly, open the water supply to the
unit (either at the CDU or in your external piping), return the 3-way valve to full-bypass, and open
the internal bypass and supply valves.
8. Check the chilled water valve piping for leaks, and return the unit to service.
9. Replace any insulation removed earlier.
10. Run test and check-out procedures on the new actuator.
11. Replace filters and doors and return the unit to service.
Warning
Doors and panels are equipped with locks. Locks must be engaged while the
unit is operating.
na2028a
Full
Bypass
Full
Cool
