4
Importing a Loop
Here’s how to import and set up a loop for use in the
Fantom-Xa. We recommend you read—and perform—the
following steps in the order in which they’re presented.
Bringing a Sample Loop Into the Fantom-Xa
The simplest way to import a loop into the Fantom-Xa is by
connecting the Fantom-Xa to your computer via USB.
If your Fantom-Xa has a memory card and your computer has a card reader,
you have an additional option. You can insert your Fantom-Xa-formatted
card into the reader and move any loop you wish to import into the
card’s AUDIO_IMPORT folder. To learn about using memory cards, see the
Fantom-Xa Owner’s Manual
.
Connecting and Activating USB Communication
This procedure is possible only with USB-supporting computers using the
following operating systems: Windows XP/2000/Me or higher, Mac OS 9.04
or higher, or Mac OS X.
When USB communication is turned on, do not unplug the USB cable
connecting the Fantom-Xa and the computer.
Before connecting the Fantom-Xa to your computer via USB
and activating communication:
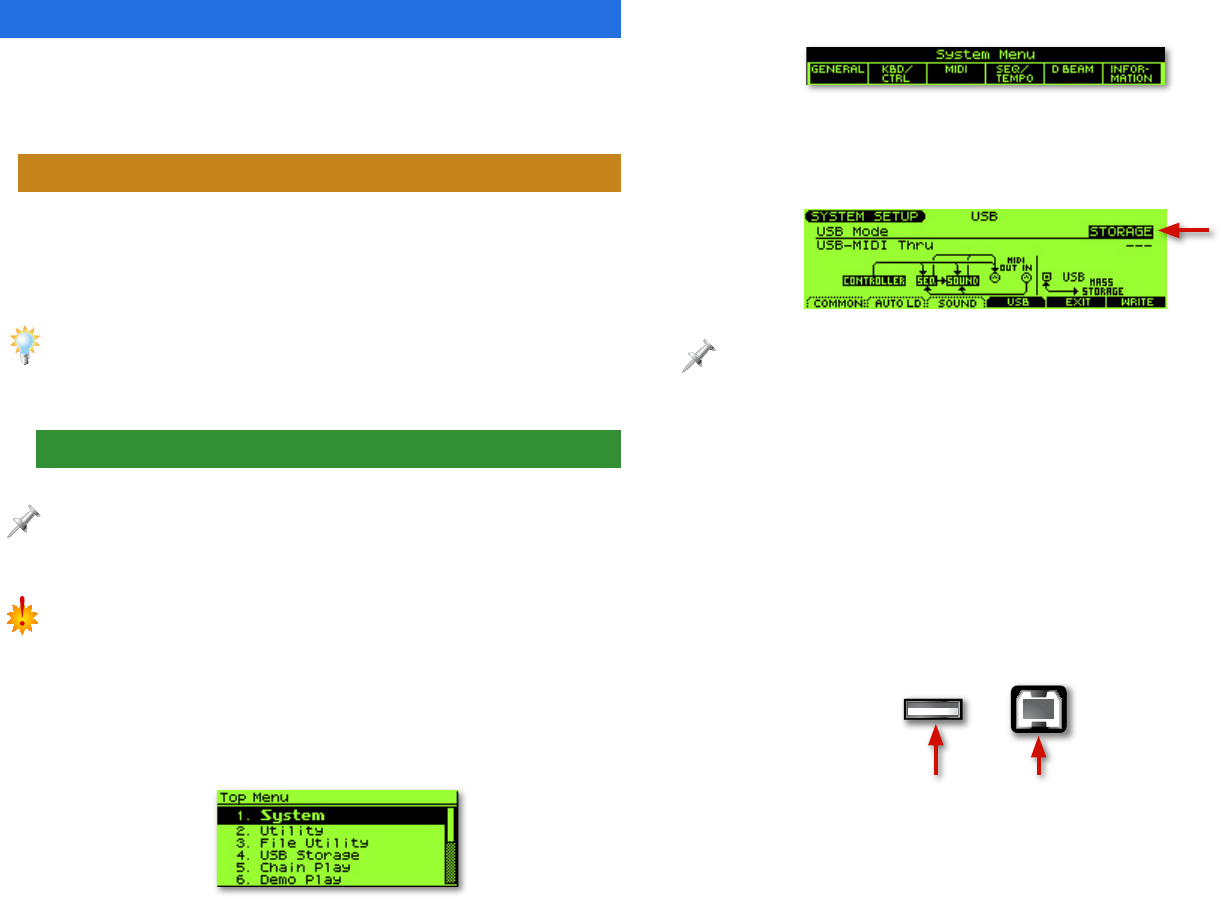
1. On the Fantom-Xa, press LAYER/SPLIT, MENU, and then
select System if it isn’t already selected.
2. Press ENTER—the System Menu window appears.
3. Press F1 (GENERAL).
4. Press F4 (USB)—by default, the Fantom-Xa’s USB connection
is set to STORAGE, as the red arrow shows here.
The Fantom-Xa’s USB connection can also be used for sending and receiving
MIDI data.
5. If USB Mode is set to STORAGE, skip to Step 7. If USB Mode
is set to MIDI, turn the VALUE dial counterclockwise until
a warning message appears, and then press F6 (OK) to
proceed.
6. Press F6 (WRITE) to store the new setting.
7. Turn off the Fantom-Xa and start up your computer.
8. Using a USB A/B-type cable, connect the A-type USB plug
to a USB jack on your computer, and the other end to the
B-type USB jack on the rear panel of the Fantom-Xa.
USB A plug USB B plug
Plug this
end into the
Fantom-Xa.
Plug this
end into the
computer.
9. Turn on the Fantom-Xa.
