


FX2NC Series Programmable Controllers Installation notes 3.
3-9
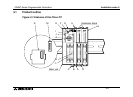
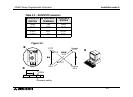
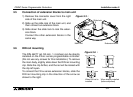
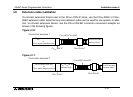
3.5 Connection of extension blocks to main unit
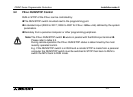
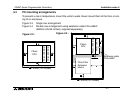
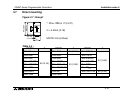
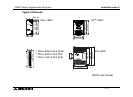
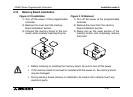
3.6 DIN rail mounting
Main unit Extension block
Slide lock
Slide lock
1) Remove the connector cover from the right
side of the main unit.
2) Slide up the slide lock of the main unit, and
then connect an extension block.
3) Slide down the slide lock to lock the exten-
sion block.
Connect the other extension blocks in the
same way.
Figure 3.3 :
Remove
Locks the clip.
When DIN rail is
When directly installed
installed
(before shipment)
The DIN 46277 rail (35 mm, 1.4 inches) can be directly
installed on the FX
2NC
series programmable controller.
(Do not use any screws for this installation.) To remove
the main body, slightly slide down the DIN rail mounting
clip. Slide the clip farther, and the rail will be locked with
the clip left open.
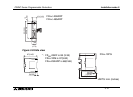
To connect the FX
2N
series extension blocks, slide the
DIN rail mounting clip in the direction of the arrow as
shown to the right.
Figure 3.6 :