MODENA 80 E
31
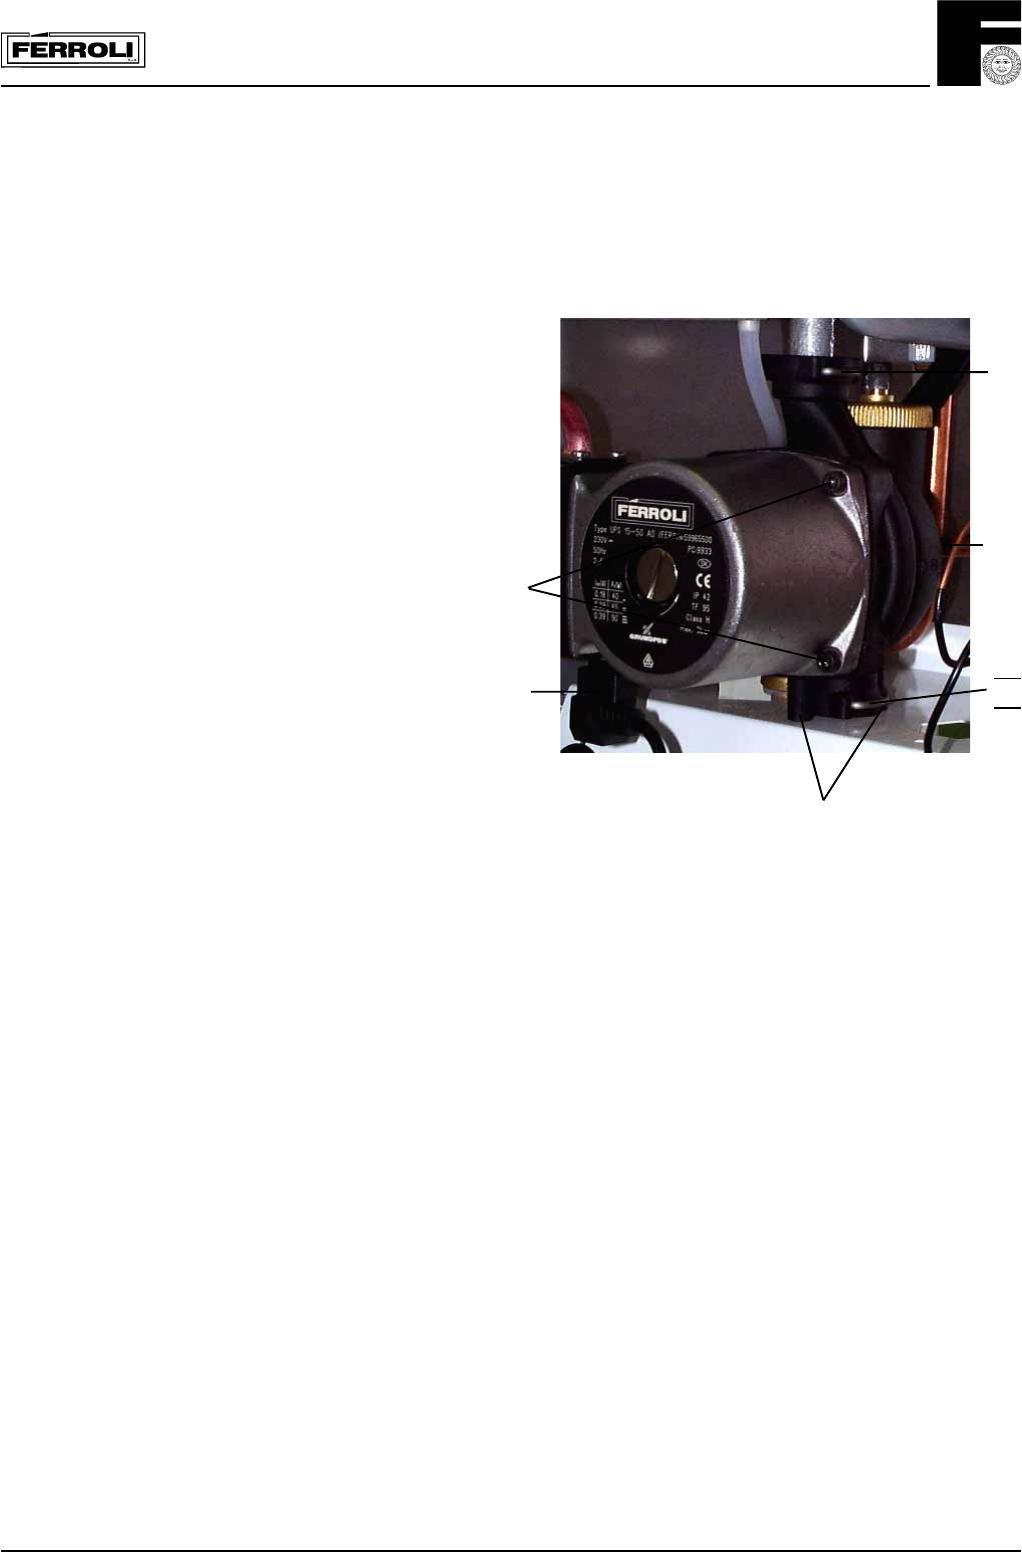
7.14 Pump (fig. 45)
Replacement of pump head
• Isolate electricity and flow and return pipes
• Remove casing (two screws bottom rear corners).
• Remove the two securing screws and lower control
panel
• Release pressure from boiler via pressure relief valve
• Unplug the pump lead "A" from the pump head
• Place a piece of cloth or other absorbent material over the
rear of the control panel to catch any drops of water that
may fall when the pump head is removed.
• Using a 4mm allen wrench undo the four allen screws
"B" in the pump head, lift away pump head from the
pump body
• fit new head into pump body and secure with the allen
screws tightening evenly.
• Replace electrical connection.
Replacement of pump body (fig. 45)
• Proceed as for removal of pump head
• Disconnect the expansion vessel connecting pipe "E"
from the rear of the pump body by removing the U clip
from the left hand side
• Disconnect the boiler return pipe and disengage the
pump lower connection by removing the U clip "C"
• Disconnect the pump to heat exchanger connection by
removing the U clip "F"
• Unscrew the two screws on bottom of pump "D"
• Turn the pump body through 90°, pull the bottom
forward and withdraw the pump body
• Reassemble in reverse order taking care to ensure the
O-rings are in place and undamaged.
Fig. 45
7.15 Removal of heat exchanger
• Isolate gas, water and electricity supplies
• Remove casing (2 screws bottom corners)
• Remove the two securing screws and lower control panel
• Drain heat exchanger for both CH + DHW
• Remove sealed compartment front panel
• Disconnect the overheat thermostat and central heating limit thermostat
• Remove the main burner, fan, flue hood and flow meter as described previously
• Remove the pump to heat exchanger flow connection and locknut
• Undo the domestic water outlet connection and locknut
• Lift out heat exchanger
• Re-assemble in reverse order
B
D
C
A
F
E


