


Front Panel Operation 91
Whenever you wish, you can return the power supply to the original factory reset state. To do this, simply hold down the
key when you turn on the supply. The display indicates RST POWER-ON to verify that the power supply has configured
its turn-on state to the original reset state. From now on it will continue to turn on in that state.
Setting The GPIB Address
Types of Power Supply GPIB Addresses
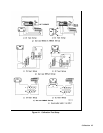
Figure 4-6 in Chapter 4 shows the ways the power supply can be connected to the GPIB bus. You can set up the GPIB
address in one of three ways:
1. As a stand-alone supply (the only supply at the address). It has a primary address in the range of 0 to 30. For example:
5 or 7.
2. As the direct supply in a serial link. It is the only supply connected directly to the GPIB bus. The primary address is
unique and can be from 0 to 30. It is entered as an integer followed by a decimal separator. The secondary address always
is 0, which may be added after the primary address. If the secondary address is omitted, it is assumed to be 0. For
example: 5.0 or 7.
3. As a linked supply in serial link. It gets its primary address from the direct supply. It has a unique secondary address
that can be from l to 15. It is entered as an integer preceded by a decimal separator. For example: .l or .12
When you enter a secondary address, leading zeros between the decimal separator and the first digit are ignored. For
example, .1, .01, and .001 are accepted as secondary address 1 and displayed as 0.01. Zeros following a digit are not
ignored. Thus, .10 and .010 are both accepted as secondary address 10 and displayed as 0. 10.
Changing the Power Supply GPIB Address
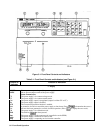
Use the
key and numerical keypad for entering addresses. The power supply is shipped with a 5 stand-alone
address as the default. The general procedure for setting an address is:
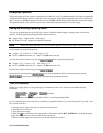
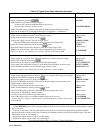
Action Display Shows
Press
Current address
Press new address keys New address replaces numbers on the display
Press
Display returns to meter mode
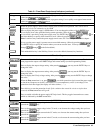
If you try to enter a forbidden number, ADDR ERROR is displayed.
The following examples show how to set addresses:
To set stand-along primary address 6, press
.
To set direct supply primary address 6, press
.
To set linked secondary address 1, press
.
To set linked secondary address 12, press
.
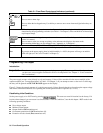
Note The power supply display will reset (recall the state in location 0) whenever you change between the
following types of GPIB addresses:
• a stand-alone primary address and a direct primary address.
• a direct primary address and a secondary address.