Facsimile
(Option) /
Internet Fax
59
5
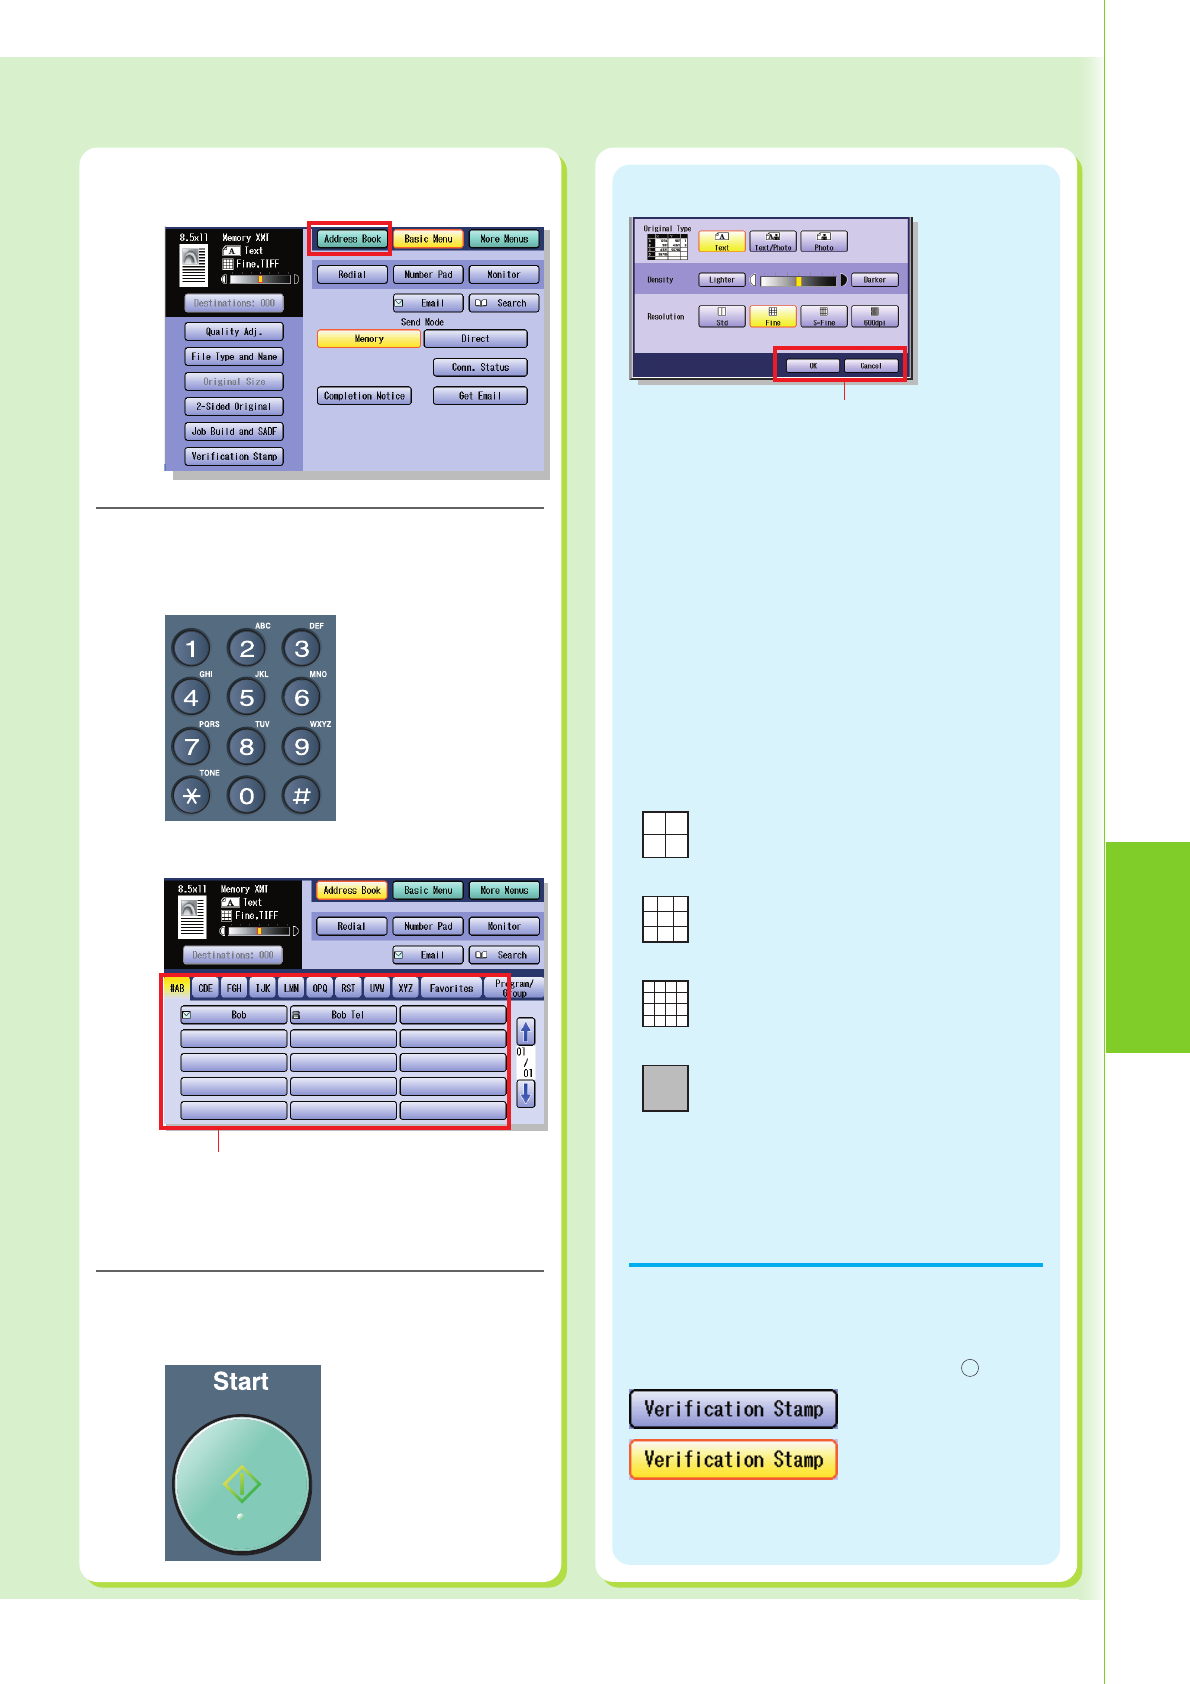
Enter the fax number.
For Manual Dialing
Enter the fax
number, and then
select “OK”.
4
Select “Address Book”.
For Address Book Dialing
Select destination station(s)
●The Address Book is available only when
destinations are registered.
(See pages 52 to 53)
Press the Start key.
6
●When sending from
the Platen Glass, place
the next original and
follow the instructions
described on the
Touch Panel Display.
Ex: Select “Basic Menu” and “Quality Adj.”.
OK : Settings are applied.
Cancel: Settings are canceled.
Original Type
Text : Use for text only originals
Text/Photo : Use for text and photo originals
Photo : Use for photo, or illustration originals
Density (Scanning Density)
Lighter or Darker (7 Levels)
Lighter :
If you wish to scan an original with lighter
contrast, select the button to reduce the
contrast level. Each time the button is
selected, the original will be scanned lighter.
Darker :
If you wish to scan an original with darker
contrast, select the button to increase the
contrast level. Each time the button is
selected, the original will be scanned darker.
Resolution
●There is a possibility that the printing quality is
determined by the reception capability of the
remote station when using the “Photo”, “S-Fine”,
or “600dpi” mode. If this happens, use the “Fine”
Resolution.
Stamp is turned OFF.
Stamp is turned ON.
●For more details, refer to Basic Fax Transmission
in the Operating Instructions (For Facsimile and
Internet Fax) of provided CD-ROM.
Std
Fine
S-Fine
600dpi
For standard originals
For detailed originals
For finer detailed originals
For 600 dpi detailed originals
Ex: When “Verification Stamp” is selected.
The Verification Stamp helps you to confirm successful
transmission by stamping the bottom of each
successfully transmitted page with a small
×
mark.


