Try it! recipes
Touch the icon on the preparation
screen to add the selected recipe to a collection
of recipes you want to make in the future. On the
Try it! screen, touch your profile’s check box by
or by
, then touch to
mark the selected recipe with the Try it! icon of
your profile. When you check off
,
you will be prompted to specify the date you want
to make the recipe on.
Once you’ve marked a recipe with , you can keep track of the recipe through
the Calendar or by selecting the button on the Search menu.
How to Use the Guide
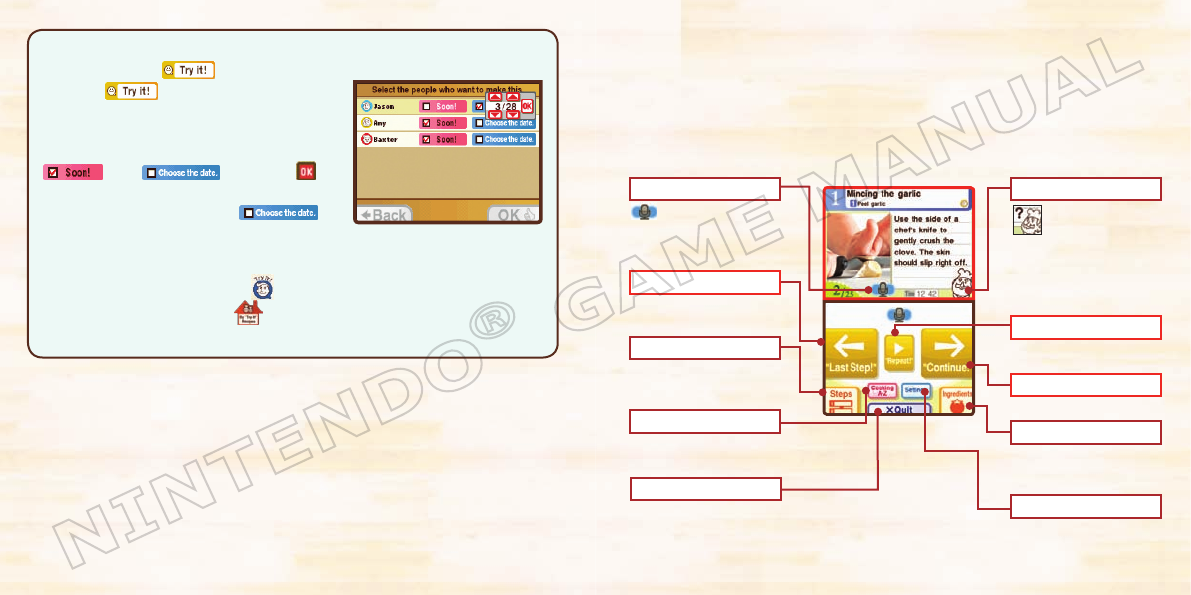
The Chef will let you know who is in charge and talk you through each of the recipe’s
steps, accompanied by written instructions displayed on the top screen. Touch the icons on
the Touch Screen to navigate through the steps. Whenever you see the microphone icon
on the Touch Screen, you can control the guide without using the stylus by simply saying
the appropriate voice command such as
Continue!
or
Repeat!
in the direction of the
microphone.
In the diagram below, voice commands are in quotation marks and are shown in red boxes.
Microphone Icon
This icon will become
larger and turn red when
the microphone is picking
up your voice.
“Last Step!”
Return to the previous
screen.
Steps
Check the steps for the
recipe here.
Cooking A-Z
Go to Cooking A-Z
(page 16).
Chef
When a question
mark appears above
the Chef’s head, it means he
couldn’t understand what
you said. Repeat the voice
command, speaking as
clearly as you can.
“Repeat!”
Listen to the step again.
“Continue!”
Go to the next screen.
Ingredients
Check the ingredients for
the recipe.
Settings
Touch here to change the
software’s settings.
Quit
Quit the guide and return to the Preparation screen. You will
also have the option to Quick Save, which will allow you to
continue cooking another time from where you left off (page 35).
