


7
english
english6
audible bleep
The Control Center features an audible bleep for confirming selection of each Input Channel. The sound can
be toggled ON and OFF by pressing the SET button for 2 seconds until the icon appears on the display. Then
use the + and - buttons to select either ON or OFF.
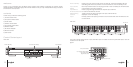
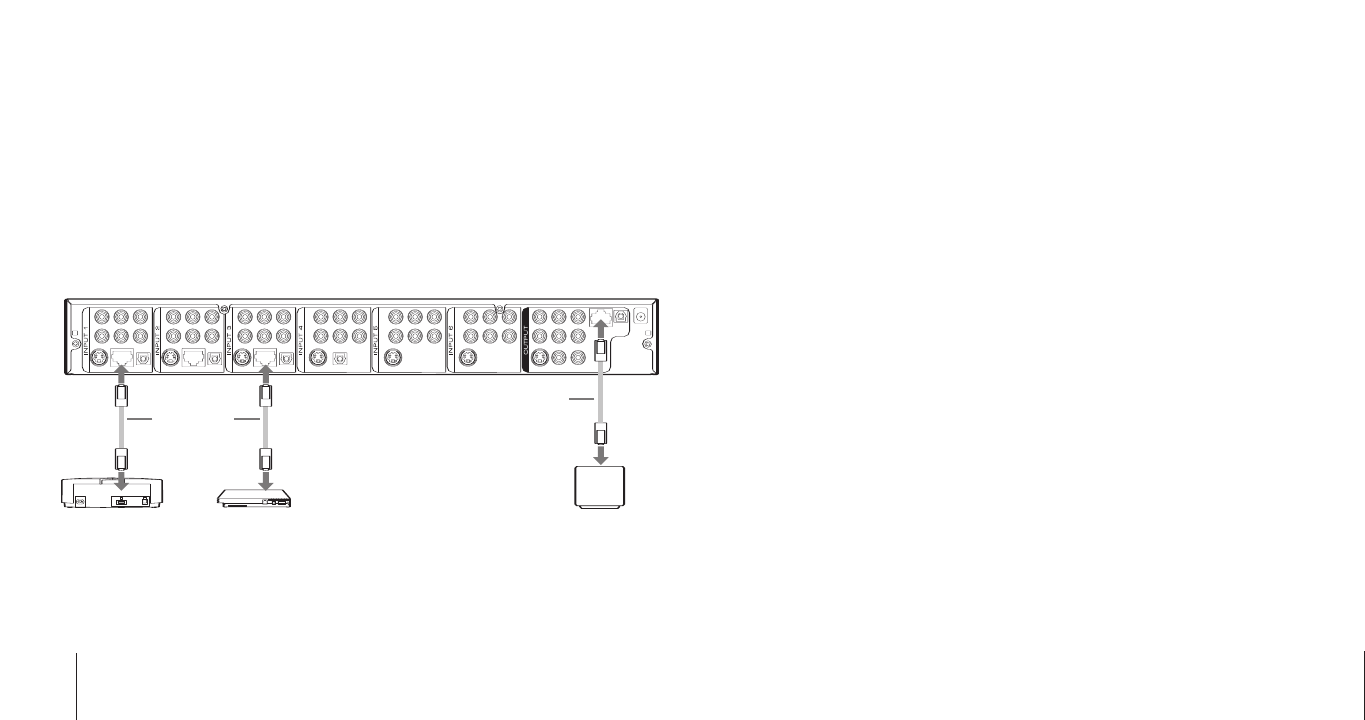
ethernet connections
When setting up more than one games console to the Ethernet ports of the Control Center (ex.
PlayStation
®
2 and an Xbox
™
), ensure that each console is connected to a separate input channel using an
Ethernet cable (RJ-45). You will also need to connect a Cable/DSL Modem to the output Ethernet port as
shown in the figure 3:
figure 3
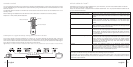
typical setup steps
1) Connect the DC Power Adapter to the DC 12V IN located on the rear panel of the Control Center.
2)Connect the desired output of the Control Center to your television, using the Component Video,
S-Video or RCA Phono Cables supplied.
Note: If you are using Component or S-Video Cables as the video output, you will need to connect the
RCA Phono (White and red) or Digital Optical Cable to the TV/Hi-Fi to receive audio. Component and
S-Video connectors do not carry an audio signal.
3)Connect your AV devices to inputs 1 to 7 ensuring the power is switched off on all devices before
connecting.
4)Switch on your TV and select the “External” input channel. (Refer to your television user guide for more
details).
5)Switch on the Control Center either by pressing the Power/Standby Button on the front or by using
the Remote Control. The Power/Standby LED will illuminate green when the unit is on.
6)The first Input Indicator to illuminate will be Input 1. Select other Inputs by pressing the SELECT Button
located on the front of the Control Center or by using the Remote Control.
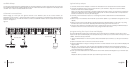
programming the input channel display
For easy identification equipment connected to the Control Center it is possible to name each of the 7
inputs on the Input Channel Display. For example should you wish Input 1 to read 'DVD' and Input 2 to read
'GAME', follow this setup procedure:
1) Using the Select Button on the front panel, select the desired Input Channel (1-7) that you would like to
name.
2)Open the access cover on the front of the Control Center.
3)Press the SET Button to begin to change the name. The first character on the Input Channel Display will
begin to flash.
4)Use the + and - buttons to cycle through all the available characters. When the desired character is
displayed, press the SET Button to select the character and move to the next. Repeat the process until
you have achieved your desired name.
5) Once you have selected the 5th character the name will be stored and assigned to your chosen Input
Channel.
Repeat the above procedure for each Input Channel you wish to name.
PlayStation
®
2Xbox
™
Ethernet Cable
Ethernet Cable
Cable/DSL
Modem