11
n52te
Table of Contents SECTIONS 1 2 3 4 5 6 7
CONFIGURING THE n52te
Creating and Assigning Macros
This section will walk you through the steps needed to create and assign
macros using the n52te Editor software.
1. Click the “New” button to create a new macro and give it a name.
2. Using the mouse cursor, click on the “Macro Definition” table to
begin recording keystrokes.
3. To manually insert keystrokes or mouse buttons, you can do so with
the “Add Key” and “Add Button” functions.
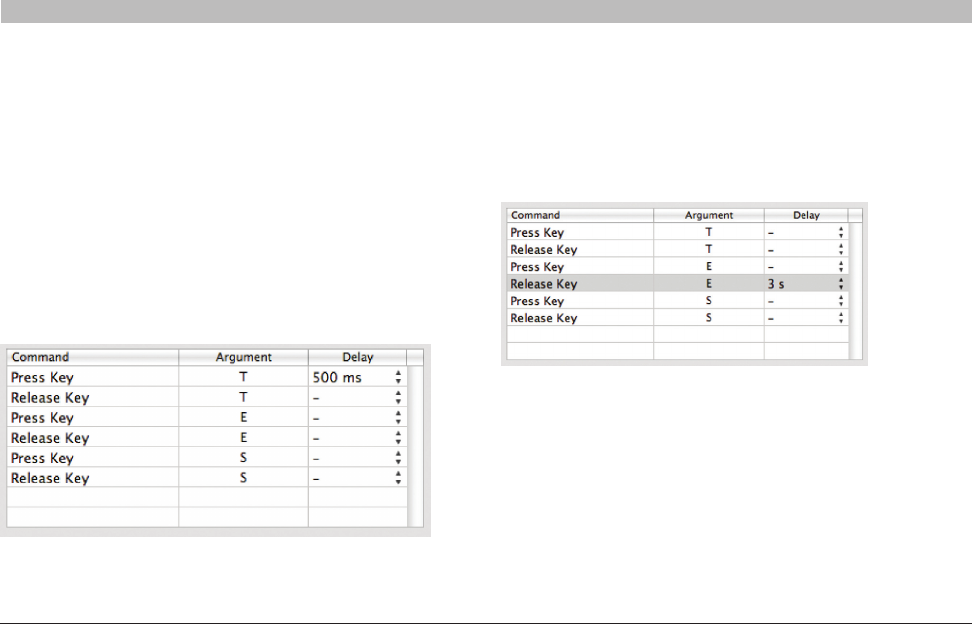
4. If you want a key to be held down for a short period of time, simply
set a delay for any “Press Key” commands. In this example, the “T”
key will be pressed and held down for 500ms.
5. If you want the macro to wait before executing a key, simply set a
delay for any “Release” action event. In this example, the macro will
press and release the “E” key, and then wait three seconds before
pressing the “S” key.
6. To manually remove items from the macro sequence, you can do so
with the “Remove” button.
7. To change playback behavior, click on the “Repeat Mode” drop-
down menu and select the desired behavior. Note: The default
repeat behavior is “Repeat Once”.
8. Once you’re finished, simply go back to the “Profiles” pane.
9. To assign the newly created profile, select the desired button, and
from the “Assignment:” drop-down menu, choose “Macro”.
10. Select your new macro under the “Macro to Run:” drop-down menu.
