COLOR CCD CAMERACOLOR CCD CAMERA User’s ManualUser’s Manual
1514
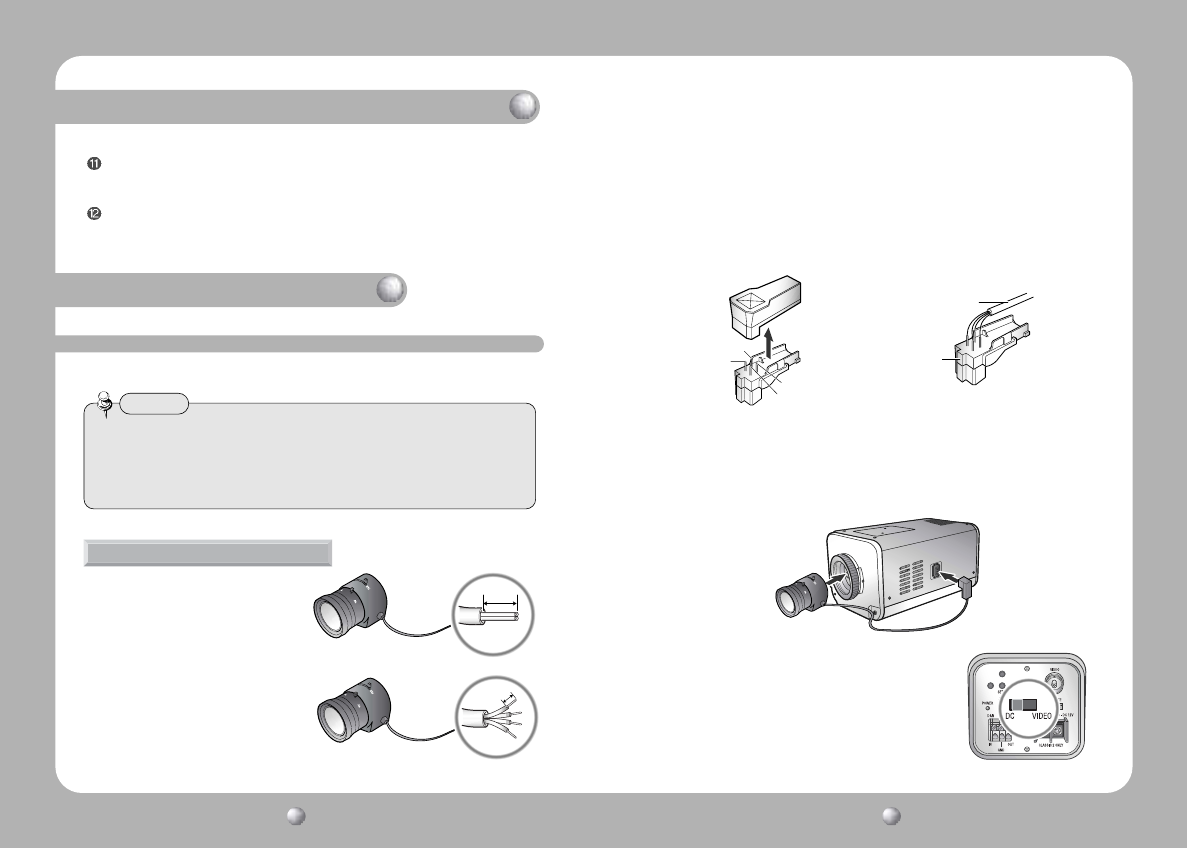
Lenses are sold separately. Auto iris, CS-mount, or C-mount lenses may be used.
3. Remove the cover from the lens connector jack and solder the cable to the jack pins.
4. Replace the cover to the lens connector jack. Remove the front glass protector from the
product and fit an auto iris lens by screwing the lens in clockwise.
5. Insert the connector jack, now soldered to the lens cable, into the lens connector port
located on the side of the product.
1. Strip the outer layer of the lens cable for
about 8mm (0.3in) from the end.
Auto Iris Lens Selection Switch
Set to DC or Video according to the lens in use
Video Output Port
For video signal output; connects to a monitor video input port
2. Strip the inner layer of the cable for about
2mm (0.08in) from the end.
pin3
pin1
Connector
Lens Cable
pin4
pin2
6. Set the lens selection switch located on the side either to
DC or to Video according to the type of auto iris lens now
in use.
Names and Functions of Each Part
Instructions: Setup
Lens
• For maximum utilization of the product’s features, we recommend the use of a
DC-type auto iris lens.
• Any dirt or smudges including fingerprints may reduce the picture quality in low
light conditions; please keep it clean.
Caution
When using an auto iris lens
• Video type :
No. 1 Pin --- Red (Power source)
No. 2 Pin --- N.C
No. 3 Pin --- White (Video signal)
No. 4 Pin --- Black (GND)
•DC type :
No. 1 Pin --- Damping -
No. 2 Pin --- Damping +
No. 3 Pin --- Drive +
No. 4 Pin --- Drive -


