C-30HD — PARTS & OPERATION MANUAL — REV. #4 (03/06/01) — PAGE 23
1. To obtain a representative sample, take samples at three or
more regular intervals throughout the discharge of the mixer
or truck. DO NOT take samples at the beginning or end of the
discharge.
2. Dampen the inside of the cone and place it on a smooth,
moist, nonabsorbent, level surface large enough to
accommodate both the slumped concrete and the slump cone.
Stand on the “foot pieces” throughout the test procedure to
hold the cone firmly in place.
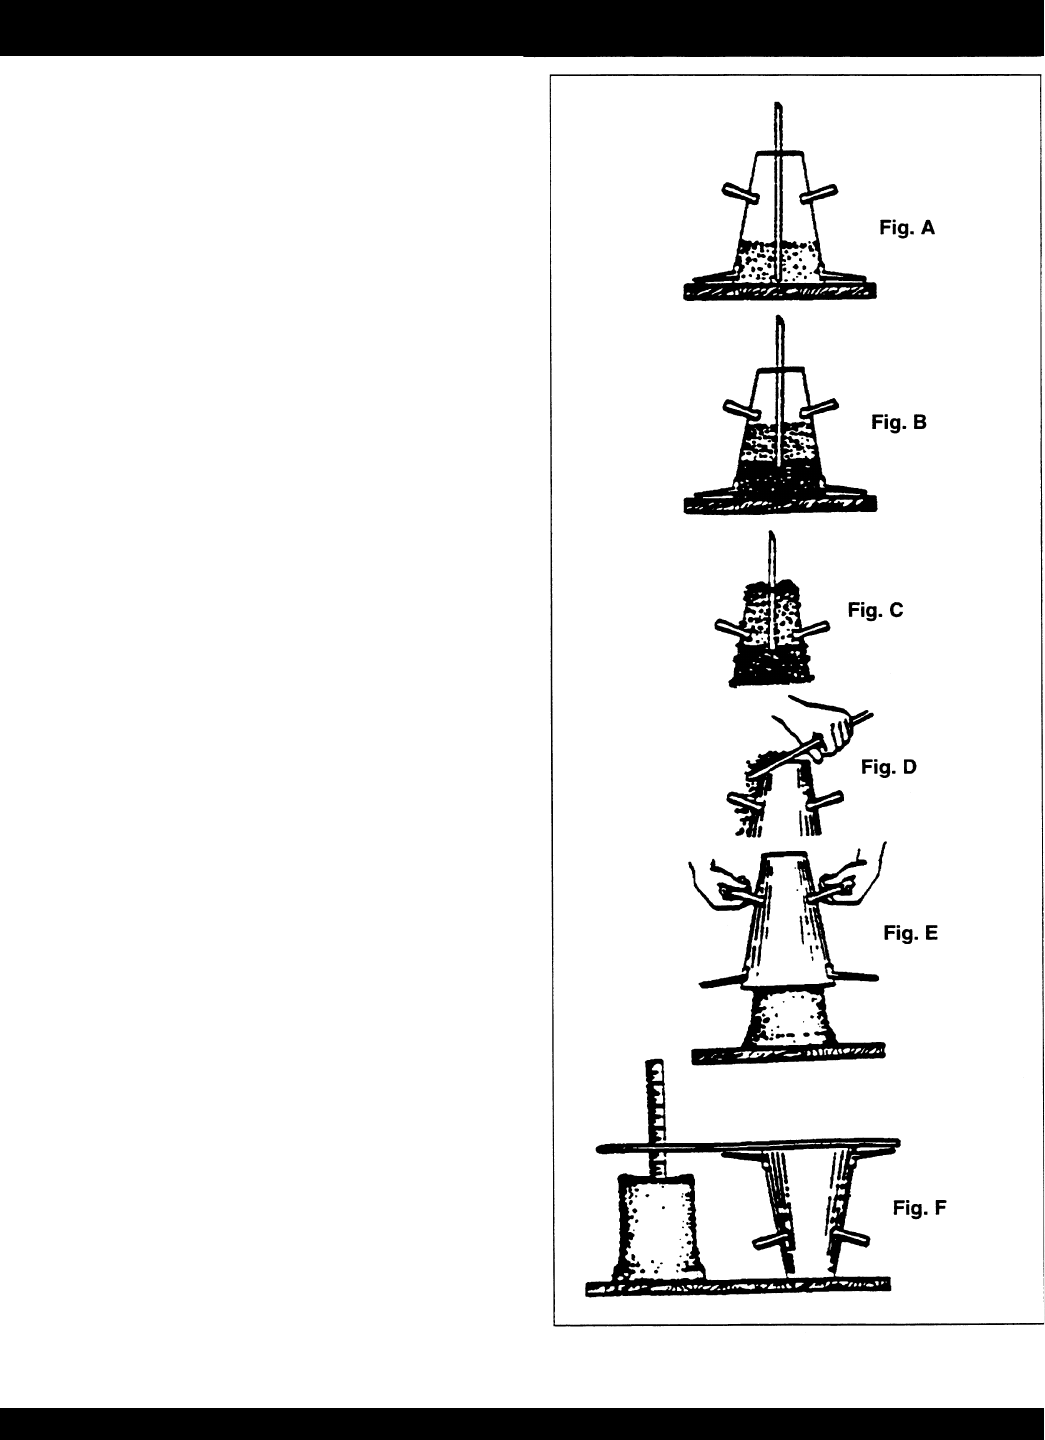
3. Fill the cone 1/3 full by volume and rod 25 times with a 1/2”
dia x 24” lg. bullet-pointed steel rod. (This is a specific
requirement which will produce non-standard results unless
followed exactly.) Distribute rodding evenly over the entire cross
section of the sample. (See figure A.)
4. Fill cone another 1/3 which will make the cone 2/3 full by
volume. Rod this second layer 25 times with the rod penetrating
into, but not through, the first layer. Distribute rodding evenly
over the entire cross section of the layer. (See figure B.)
5. Fill cone to overflowing. Rod this layer 25 times with rod
penetrating into but not through, the second layer. Distribute
rodding evenly over the entire cross section of this layer. (See
figure C.)
6. Remove the excess concrete from the top of the cone, using
the tamping rod as a screed. (See figure D.)
7. Lift the cone vertically with a slow even motion. Do not jar
the concrete or tilt the cone during this process. (See figure
E.) Invert the withdrawn cone, and place it next to, but not
touching the slumped concrete.
8. Lay a straight edge across the top of the slumped cone.
Measure the amount of slump in inches from the bottom of
the straight edge to the top of the slumped concrete at a point
over the original center of the base (See Figure F). The slump
operation must be complete in a maximum elapsed time of 1-
1/2 minutes. Discard the concrete. DO NOT use it in any other
tests.
SLUMP TEST PROCEDURE
