Operating Procedures
September 2000 3-25
Paper Loading Options
NOTE: For options in which the first exposure is not individually punched, the first
exposure will use 33 inches of paper. To minimize paper waste, the size of
the images for the first exposure should total 33 inches whenever possible.
Selecting the Paper Load Option
1. Select “Setup” from the main menu on the OCP.
2. Select “Printer”.
3. Select “Paper Load”.
4. Use the Up and Down Arrows to select the desired paper load option.
5. Press Select to select/set the new value.
6. Select “Exit” to return to the previous menu on the OCP.
2-Step Paper Loading
The 2-step paper loading process is used when you choose the “2-Step Dark” or
“2-Step Light” option for paper loading. This process minimizes paper waste by
printing on the paper before the paper is threaded to the takeup area and you
cinch it onto the takeup cassette.
The 2-step loading process is different than the 1-step loading process that is
used for loading paper under “1-Step Normal” or “1-Step Save” conditions. When
you choose “1-Step Light” or “1-Step Save”, the paper is threaded through the
shoe and cinched onto the takeup cassette before images are printed.
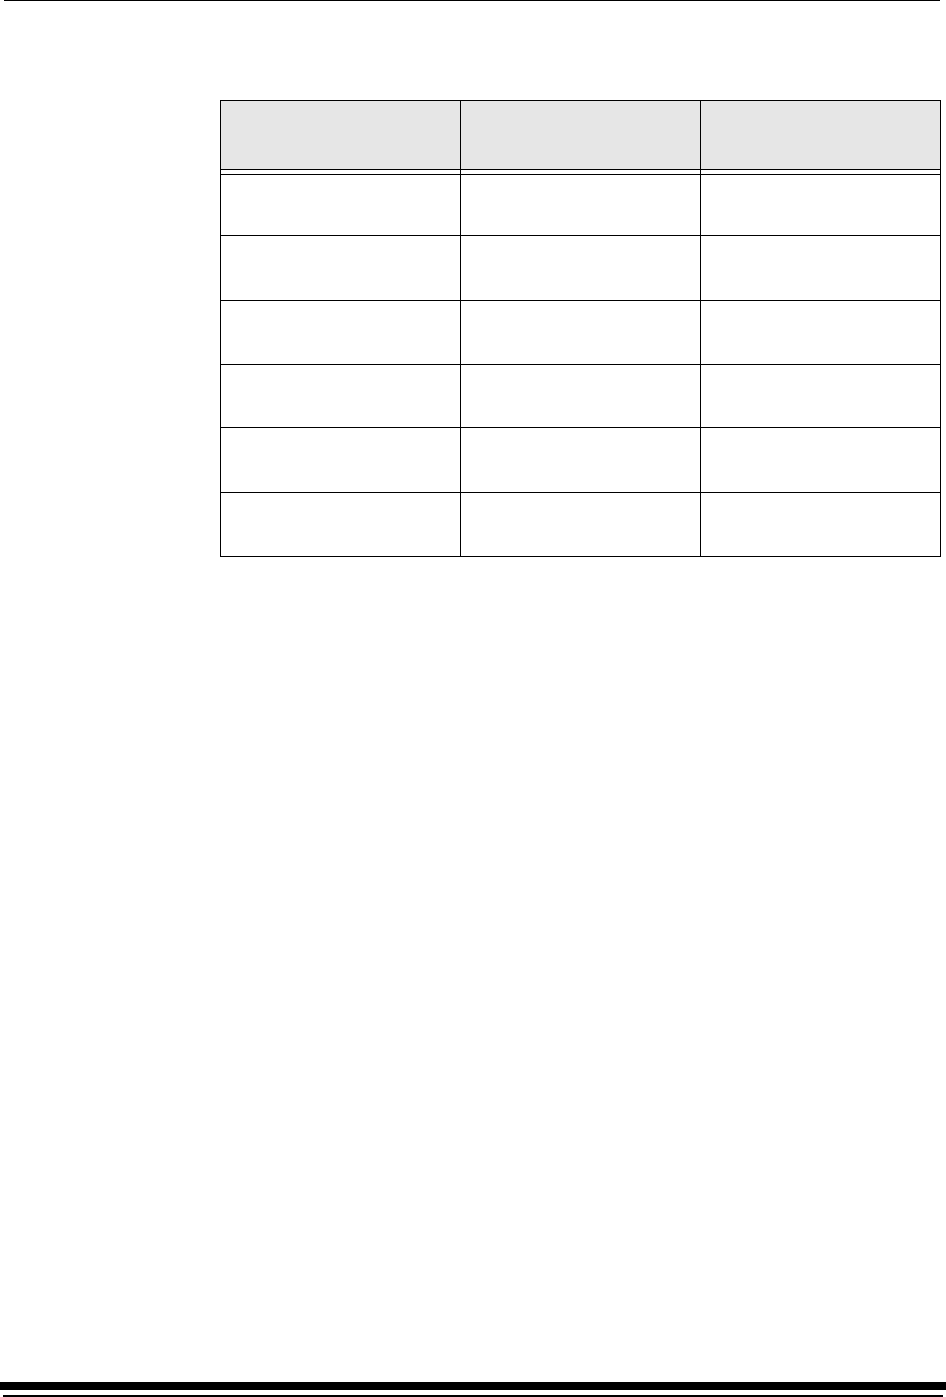
Load Option
Lead Edge Paper
Waste
Paper Punches
1-Step Normal
(factory default)
108 inches at all images
1-Step Save 62 inches at all images after the
first exposure
2-Step Dark
(new load)
35 inches at all images
2-Step Dark
(rethread)
18 inches at all images after the
first exposure
2-Step Light
(new load)
47 inches at all images
2-Step Light
(rethread)
47 inches at all images after the
first exposure


