11
Battery charging
Make sure power circuit voltage is the same as that
shown on the charger specification plate. Connect
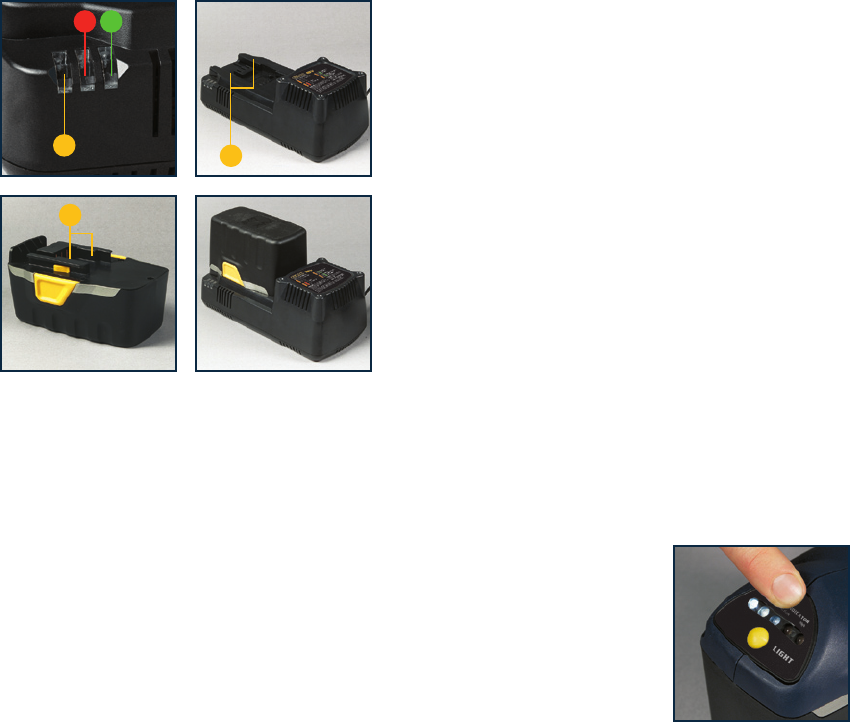
charger to power source. The yellow light (a), should light
up. This indicates the charger is ready to begin charging.
Position battery pack on charger; align rails (d), on battery
charger with (e) on battery pack. Slide battery forward onto
charger until it clicks into position.
The red light (b), should begin to glow continuously,
indicating that the battery pack is receiving a “Fast Charge”.
Note. If the red light does not glow continuously, but the
yellow light is flashing and the green light (c), begins
to glow, remove battery and re-insert when battery
temperature is between 0°C and 40°C.
After approximately one hour, the “Fast Charge” indicator
red light (b) should go out indicating that the battery pack is
fully charged and that the charger is now in a “Maintenance
Charge” mode, this is confirmed by the green light (c)
coming on. The battery pack can be left on “Maintenance
Charge” until you are ready to use it.
To remove the battery pack from the charger depress
the battery pack release buttons (6).
Depending on room temperature, line voltage, and existing
charge level, initial battery charging may take longer than
one hour.
Disconnect charger from power source when not in use.
To obtain the best life for the battery
Never allow the drill to come to a complete stand still
before recharging. The battery should be placed on charge
whenever the battery is noticeably running down or the drill
no longer performs a task it previously performed.
Avoid conducting short charges. Make sure that the
battery is fully charged every time by allowing the charger
to complete its full charging cycle.
Avoid allowing lose items like screws or nails etc to be
stored with battery packs as these or similar items can
short battery packs and cause a fire or explosion.
Always unplug the charger when not in use and store in
a dry secure place.
Avoid charging or storing your battery in temperatures
below 0ºC and above 40ºC.
Battery indicator
Press the battery indicator button (12), this will display the
level of charge remaining in the
battery. The LED’s lighting up
indicate the charge remaining
in the battery, the higher the
number of LED’s the more
charge remaining in the battery.
When the battery indicator
is showing only one LED the
battery should be removed and
put on the charger.
c
b
a
d
e
