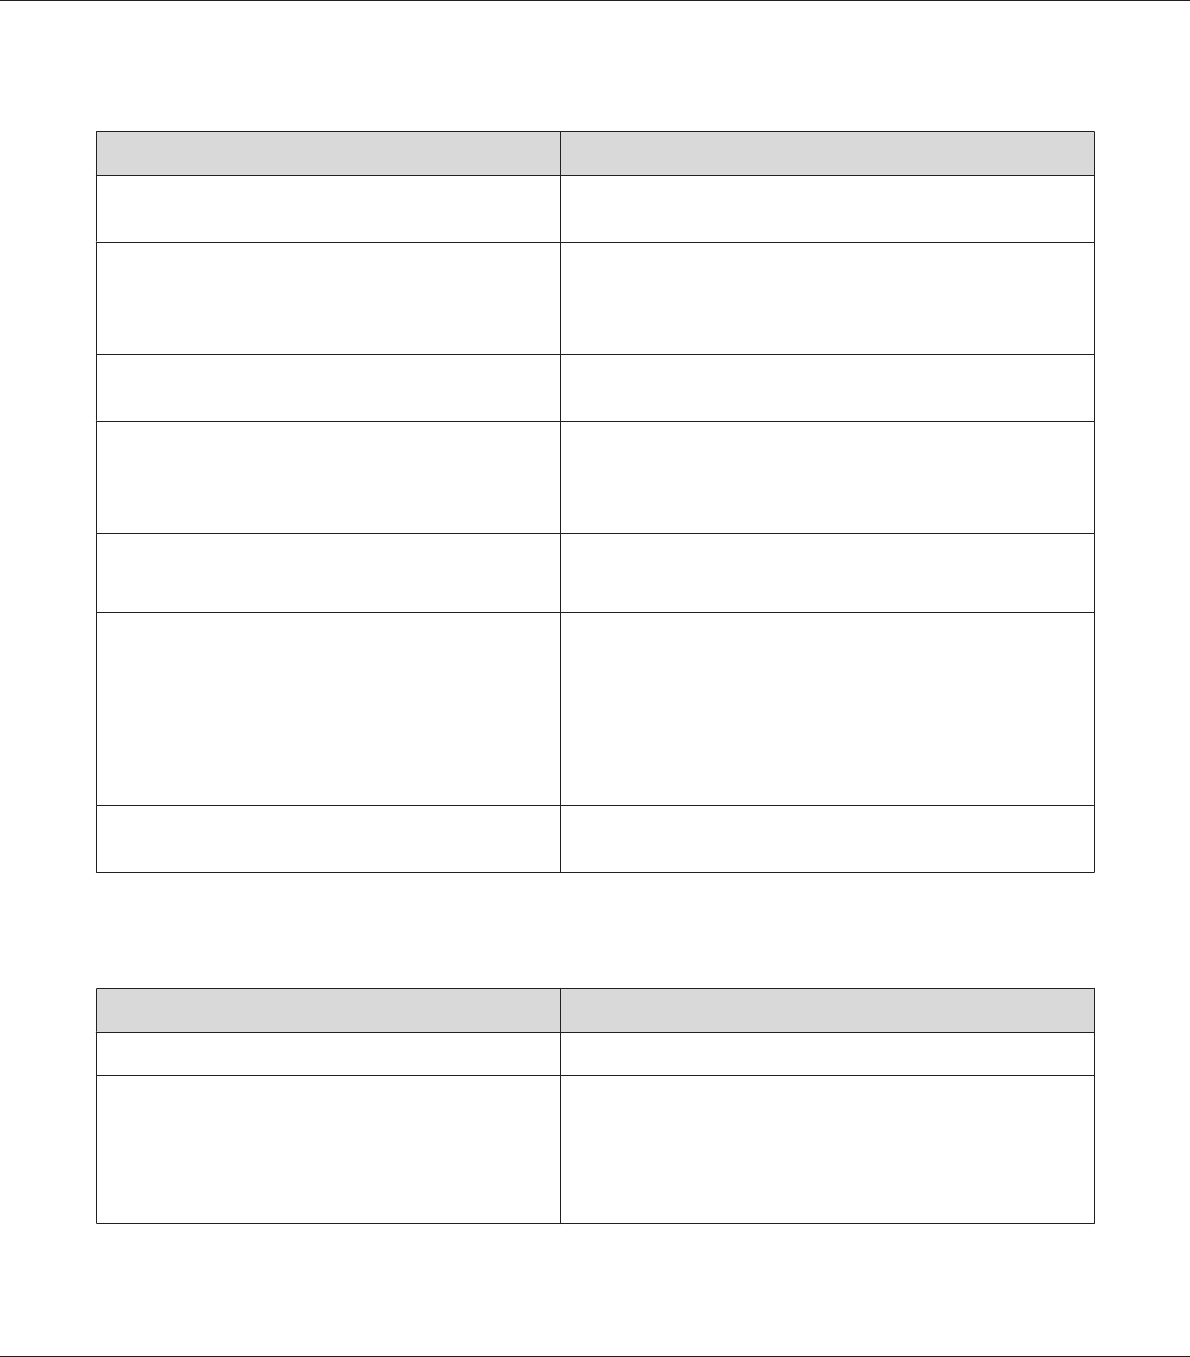
Completely blank pages are output
Cause What to do
The printer may have loaded more than one sheet at a
time.
Remove the paper stack and fan it. Tap it on a flat surface to even
the edges, then reload the paper.
The problem may be with your application or interface
cable.
Print out a configuration status sheet. See “Printing a
Configuration Status Sheet” on page 184. If a blank page is
ejected, the problem may be with the printer. Turn off the printer
and contact your dealer.
The Paper Size setting may be incorrect. Make sure the correct paper size is set in the Tray Menu on the
control panel.
The MP Tray Size setting may be incorrect. When loading paper for which the size is not specified with Auto
setting, specify the correct paper size by the tray paper size switch
or on the MP Tray Size setting in the Tray Menu on the control
panel.
The cartridge seal may not be pulled out of the imaging
cartridge.
Make sure that the cartridge seal has been pulled out completely.
For details, see the instructions on the imaging cartridge package.
The imaging cartridge may be near the end of its service
life.
If the message on the LCD panel or in EPSON Status Monitor
indicates that the imaging cartridge is near the end of its service
life, replace the imaging cartridge. See “Replacing Consumable
Products” on page 147.
For Windows users, you can also check the remaining service life
of the imaging cartridge by looking at the Basic Settings tab in
the printer driver.
There may be a problem with imaging cartridge. Replace the imaging cartridge. See “Replacing Consumable
Products” on page 147.
The printed image is light or faint
Cause What to do
Your paper may be moist or damp. Do not store your paper in a humid or damp environment.
The Toner Save mode may be on. Turn off the Toner Save mode using the printer driver or the
printer’s control panel menus.
For Windows users, on the Basic Settings tab in the printer driver,
click Advanced and select the More Settings button. Then
deselect the Toner Save check box.
EPSON AcuLaser M8000 Series User's Guide
Troubleshooting 192
