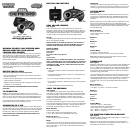
Basic Controls:
Directional Pad (D-Pad)
• Left, Right, Down – use to move the beans left, right, or pr
ess down to
move faster
Button A, B, C
• use to rotate buttons as they fall
FLICKY
The Legend
Based on an arcade game released in 1984, Flicky puts players in the
character of a mother bird who has to protect her babies, Chirps, from a
hungry tomcat name Tiger and a lizard named Iggy. Try and rescue the
Chirps and get them back home before it is too late!
Basic Controls
Directional Pad (D-Pad)
• Left, Right, Up, or Down – Control your character
Button A, B, or C
• Jump
• Throw Item
KID CHAMELEON
The Legend
Released in 1992, Kid Chameleon took full advantage of the Genesis
hardware, pushing the system to its limits. With over 100 non-linear lev-
els, the game was different almost every time you played it.
The newest ar
cade machine is fun to play, till you lose your life… literally.
Kids everywhere are gobbled up by the machine, including Kid
Chameleon. However, once inside, Kid Chameleon discovers his unique
powers and quests to rescue the captured kids. Whenever he finds a
helmet, it transforms him into anything fr
om a samurai to a hockey mask-
wearing maniac. Do you have what it takes to conquer the ultimate video
game?
Basic Controls
Directional Pad (D-pad)
• Left or Right– Move your character in that direction
• Down – Crouch/Duck
• Down Diagonal – Crawl
Button A
• Speed, press and hold to speed up
Button B
• Jump, hold to jump higher
Button C
• Special Helmet Power
Iron Knight – Crawl up walls and obstacles
Red Stealth – Slash with Swor
d
Berzerker – None
Maniaxe – Throw Axes
Juggernaut – Fire Skull Bombs
Micr
omax –
None
EyeClops – Light up Invisible Blocks
Skycutter – Fly Upside Down
Cyclone – Whirl and Fly
Combo Moves
• Button A + Start Button – Energize Diamond Powers. Using with dif
fer
-
ent helmets gives you different powers but costs you diamonds.
• D-pad + Button B – Jump Left or Right
• D-pad + Button B then Button B – Jump and flip. Only works near the
edge of platforms when Kid Chameleon is not wearing a helmet
• D-pad + Button A + Button B – Running High Jump
TROUBLE SHOOTING
TV
To locate your auxiliary channel, which is usually not 3 or 4, but a gaming
channel found mostly found between 2 and 99 (example 2, 1, 0, 99), first
try 00 to see if it is the auxiliary channel. Channels downwards from 3
until a Line 1 or Line 2, Video 1 or Video 2, Front, Aux, AV, etc., appears
on screen, then push the power button on the game and it should auto-
matically come on if you have selected the correct channel. If this does
not work, another way to determine your auxiliary channel is to take a
look at your television remote. There may be a button on the remote that
may take you directly to the correct channel. The buttons you are looking
for may be labeled Input, AUX, AV, Line, TV/Video, or Video. If your
remote has one of these buttons, turn your television back to Channel 3
and select that button. The power button on the game should be turned
on in order for the game to appear on the television. If your television
remote does not have any of these buttons, and channel 00 is not work-
ing, you may need to search the main menu for a way to determine your
auxiliary channel. If none of these methods have helped you locate your
auxiliary channel, you may need to check your owner's manual and/or
contact a local television repair company.
VCR
When connecting to a VCR, you must first start with a blue background
showing on your television screen. To obtain a blue screen, try inserting
a videotape into the VCR, let it start to play, then hit the stop button. This
may give you a blue screen, then you can channel down to your auxiliary
channel. If the blue screen still does not appear, try entering your TV
and/or VCR main menu and see if it gives you options to select a blue
screen background. Many times if you enter the main menu on your tele-
vision you can change the setting from cable to video and display a blue
screen. Also if you have an older television, you may locate a hidden door
on your television that has color, picture, horizontal, vertical, and cable,
antennae buttons. If your television includes this panel, you can select
the antennae/cable button and see the blue screen appears. If you have
tried all of these options and ar
e still unsuccessful connecting the con-
sole, then you may need to check your VCR owner’s manual or contact
the manufacturer to find out how to set up your VCR for console games.
Remember, you can't play our games through a cable box or satellite, so
if you own one of these make sure it is turned off before connecting the
game. You can connect our games through DVD players with the same
connection as a VCR.
If you still have dif
ficulty with setup or operation of your game, please call
our players helpline mentioned at the end of this manual.
If you choose to use an AC Adapter we suggest the following :
Output:
-Voltage: 6 Volts DC
-Current: 300 mA (minimum)
Polarity: Negative Center
Plug Size: 5.5 mm outside diameter, 2.1 inside diameter.
AC Adapters are available at most electronic stores.
If you use the product with a transformer, regularly examine for damage
to the cord, plug, enclosure and other parts. In the event of any damage,
do not use the toy with the transformer.
CAUTION
• As with all small batteries, the batteries used with this device
should be kept away from small children who might still put things
in their mouths. If a battery is swallowed, consult a physician
immediately.
•
Be sur
e you insert the battery corr
ectly and always follow the
device and battery manufacturer’s instructions.
• Do not dispose of batteries in fire.
• Batteries might leak if improperly installed, or explode if
recharged, disassembled or heated.
MAINTENANCE
• Handle this device carefully.
•
Stor
e this device away fr
om dusty or dirty ar
eas.
• Keep this device away from moisture or extreme temperature.
• Do not disassemble this device. If a problem occurs, press the Power
button off and on, or remove and replace the batteries to reset the
device, or try new batteries. If pr
oblems persist, consult the warranty
information located at the end of this instruction manual.
• Use only the recommended battery type.
• Do not mix old and new batteries.
•
Do not mix alkaline, standar
d (carbon-zinc) or r
echar
geable (nickel-
cadmium) batteries.
• Do not use rechargeable batteries.
• Do not attempt to recharge non-rechargeable batteries.
•
Remove any exhausted batteries fr
om the device.
•
Do not short-cir
cuit the supply terminals.
• Insert batteries with the correct polarity.
Please retain this for future reference.
This product complies with Part 15 of the FCC Rules. Operation is sub-
ject to the following two conditions: (1) this device may not cause harm
-
ful interference and (2) this device must accept any interference received,
including interference that may cause undesired operation.
WARNING: Changes or modifications to this unit not expressly approved
by the party responsible for compliance could void the user’s authority to
operate the equipment.
NOTE: This equipment has been tested and found to comply with the
limits for a Class B digital device, pursuant to Part 15 of the FCC Rules.
These limits are designed to provide reasonable protection against harm-
ful interference in a residential installation. This equipment generates,
uses and can radiate radio frequency energy and if not installed and used
in accordance with the instructions, may cause harmful interference to
radio communications. However, there is no guarantee that interference
will not occur in a particular installation. If this equipment does cause
harmful interference to radio or television reception, which can be deter-
mined by turning the equipment off and on, the user is encouraged to try
to correct the interference by one or more of the following measures:
• Reorient or relocate the receiving antenna.
• Increase the separation between the equipment and receiver.
• Connect the equipment into an outlet on a circuit different from that to
which the receiver is connected.
• Consult the dealer or an experienced radio TV technician for help.
90-DAY LIMITED WARRANTY
(This product warranty is valid in the United States and Canada only)
Radica Games Limited warrants this product for a period of 90 days from
the original purchase date under normal use against defective workman-
ship and materials (batteries excluded). This warranty does not cover
damage resulting from accident, unreasonable use, negligence, improper
service or other causes not arising out of defects in material or workman-
ship. Radica Games Limited will not be liable for any costs incurred due
to loss of use of this product or other incidental or consequential costs,
expenses or damages incurred by the purchaser. Some states do not
allow the exclusion or limitation of incidental or consequential damages,
so the above limitations may not apply to you. This warranty gives you
specific legal rights and you may also have other legal rights, which vary
from state to state.
During this 90-day warranty period, the game will either be repaired or
replaced (at our option) without charge to the purchaser when returned
prepaid with proof of date of purchase to: Radica USA, Ltd., 13628-A
Beta Road, Dallas, Texas 75244, USA. Please remove the batteries and
wrap the unit carefully before shipping. Please include a brief description
of the problem along with your return address and mail it postage
prepaid.
IMPOR
T
ANT
: Befor
e r
eturning the unit for repair, test it with fresh alkaline
batteries. Even new batteries may be defective or weak and low battery
power is a frequent cause of unsatisfactory operation.
RADICA:®
ARCADE LEGENDS IS A TRADEMARK
OF RADICA GAMES L
TD.
©2004 RADICA GAMES LTD.
PRODUCT SHAPE™
ALL RIGHTS RESERVED
Game Softwar
e ©SEGA CORPORA
TION, 1988 - 1992 All rights r
eserved.
“SEGA and Sega Logo ar
e r
egister
ed trade mark of Sega Corporation”
Manufactured and distributed by Radica under license by SEGATOYS
Distributed in the U.S. by:
RADICA U.S. Ltd.
13628-A Beta Road
Dallas, TX 75244-4510


