4
Step 1: Secure the seat back using attached hook & loop fasteners.
Step 2: Connect audio cords from backrest and headrest.
Step 3: Connect plugs from base and backrest.
Step 4: Insert power receptacle (4) into adapter (2).
Step 5: Plug adapter (2) into outlet.*
Step 6: Turn Boomchair® on by turning Power knob (C) clockwise.
STEP 2
STEP 3
STEP 4
STEP 5
POWER
INPUT OUTPUT
RR
LL
VIBRATION
+
BASS/TREBLE
+
VOLUME
+
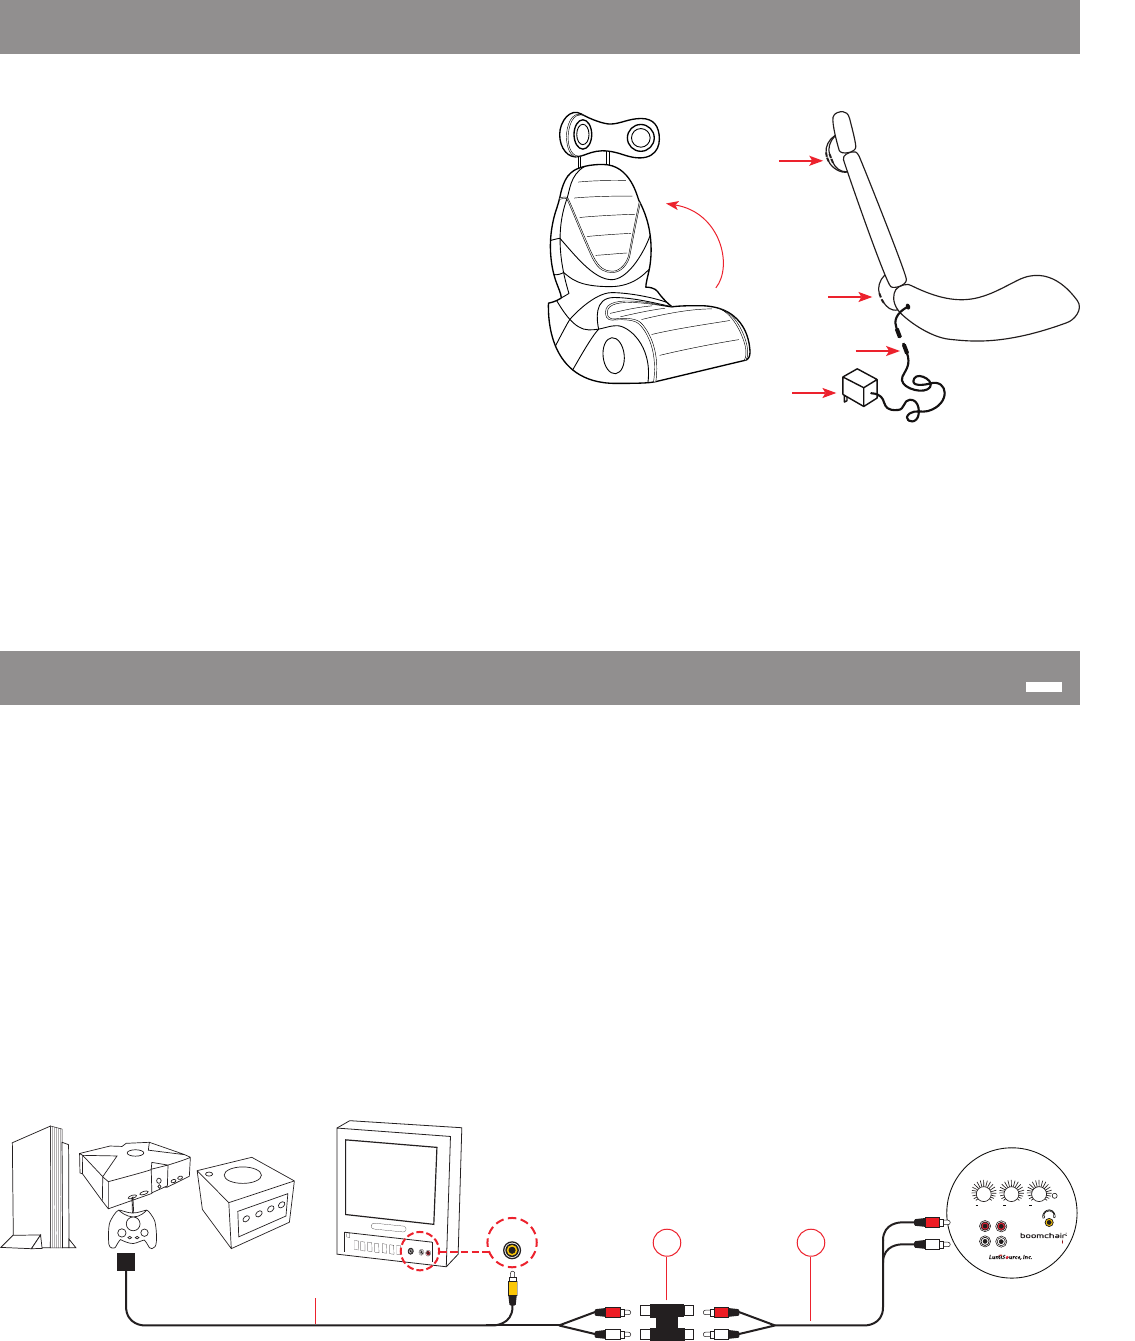
Step 1: Using the console’s custom RCA cord, plug yellow composite video cable from game console into video input of TV. (Fig. 1)
Step 2: Plug Red/White RCA cord from game console into RCA INPUT (G) of BoomChair® . (Fig. 2)
Step 1: Connect Audio Coupler (3c) to Red/White RCA cord from game console.
Step 2: Connect one end of RCA cord (3b) into other end of Audio Coupler (3c).
Step 3: Connect other end of RCA cord (3b) into RCA INPUT (G) of BoomChair® .
IN
Note: Most game consoles are supplied with a custom connector with yellow video out and RCA red/white audio out.
3c 3b
GAME CONSOLE TV
BOOMCHAIR®
Fig. 1
Fig. 2
Cable supplied with game console
Fig. 3
Note: It may be necessary to extend your BoomChair® further away from your TV or console. Here’s how. (Fig.3)
AUDIO COUPLER (3c)
ASSEMBLY INSTRUCTIONS
STEP 1
CONNECTING TO GAME CONSOLES
*CAUTION: Use only provided adaptor! Different voltage may cause permanent damage.


