


WIRELESS STEREO HEADSET
ATH-BT03
INSTRUCTIONS
This equipment has been tested and found to comply with the limits for a Class B
digital device, pursuant to Part 15 of the FCC Rules. These limits are designed to
provide reasonable protection against harmful interference in a residential installation.
This equipment generates, uses and can radiate radio frequency energy and, if not
installed and used in accordance with the instructions, may cause harmful
interference to radio or television reception, which can be determined by turning the
equipment off and on, the user is encouraged to try to correct the interference by one
or more of the following measures:
-Reorient or relocate the receiving antenna.
-Increase the separation between the equipment and receiver.
-Connect the equipment into an outlet on a circuit different from that to which the
receiver is connected.
-Consult the dealer or an experienced radio/TV technician for help.
This device complies with Part 15 of FCC Rules and RSS-Gen of IC Rules. Operation is
subject to the following conditions: (1) this device may not cause harmful interference,
and (2) this device must accept any interference received, including interference that
may cause undesired operation of this device.
You are cautioned that any changes or modifications not expressly approved in this
manual could void your authority to operate this equipment.
Note
Information
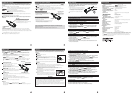
Verifying package contents
• XS size x 2 pcs
• S size x 2 pcs
• M size x 2 pcs
• L size x 2 pcs
This product is supplied with the
M size earpieces on the product.
Earpieces (ER-CKM55)
Charging USB cable (1.0 m)
ATH-BT03
Before you start using the product, make sure that all the following articles have been
supplied. If any article is not supplied or is damaged, contact your Audio-Technica
dealer.
Headset parts
■Headphones
Housing
External
view
Earpieces
L/R display
Bushing
60 cm cord
Slider
Reset button
For details,
see page 13.
■Control
Operation button
Use to listen to music
or make a call.
Microphone
Call button
Press to make a call.
Clip
LED (red)
LED (blue)
Micro USB
jack
Pairing
button
Cap
Release the cap
from the claw.
Power/Effect button
Turns this product on and off.
Doubles as a 3D BASS effect mode switch*.
* For details, see 3D BASS effect function on page 9.
Press and hold the Power/Effect
button for three seconds or longer.
Pairing
Use this procedure to pair devices beforehand to allow them to communicate with each
other. devices should first be paired before connection. To hear the verifying
beep of pairing, put on the headphones before you start the pairing procedure.
※
For information on how to put on the headphones, see “Listening to music” on page 7.
※
Also read the instruction manuals supplied with the products that are to be connected.
1. Place the devices within one meter of each other.
2. With the product in power off mode, press and hold the Power/Effect button for three
seconds or longer. The blue LED will blink three times as the product is turned on.
3. Press and hold the Pairing button for three seconds or longer to activate the pairing
mode.
A beep sound will be heard to indicate that pairing has started.
The red and blue LEDs will blink alternately during pairing.
※
Pairing may take a while.
4. Perform pairing on the other device to find the product.
The screen of the other device will display a list of found devices.
This product will appear as “ATH-BT03” on the screen.
5. Select “ATH-BT03” displayed on the screen of the other device.
※When you are prompted for a pass code on the screen of the other device,
enter 0000.
When the blue LED changes to slow blinking, pairing is complete.
■Operation during pairing
The red and blue LEDs will blink
alternately during pairing.
Press and hold the Pairing button
for three seconds or more.
The frequency band used by the product is also used by microwave ovens and other
industrial, scientific and medical instruments as well as short range wireless base stations
for identifying mobile devices (requires a license) on plant production lines, specified low
power base stations (does not require a license) and amateur radio stations (requires a
license).
1. Before using this product, make sure there are no short range wireless base stations for
identifying mobile devices, specified low power base stations or amateur radio stations
nearby.
2. In the unlikely event that use of this product causes serious interference with a short
range wireless base station for identifying mobile devices, stop transmitting radio waves
immediately. Then contact your Audio-Technica dealer regarding interferences
countermeasures (for example, installing partitions, etc.) to prevent interferences.
3. Also contact your Audio-Technica dealer regarding other problems involving serious
interference with a short range wireless base station for identifying mobile devices and
amateur radio stations or questions regarding such
interference.
devices
Supported version and profile
● Available operating range
The product operates up to 10 meters from a transmitting device, however
obstacles between the transmitting device and the product or the structure of
the building you are in may reduce the operating distance.
● Interference with other devices
Microwave ovens, digital cordless phones, devices using wireless LAN, devices
and other devices using the same 2.4 GHz frequency band may cause dropouts. Similarly,
since this product will also interfere with such devices, it is essential that devices that are
likely to interfere with each other are kept apart.
● Note that Audio-Technica accepts no liability whatsoever for leakage of data during
transmission.
This product supports the following version and profile.
■Communication system: Ver. 2.1 + EDR
■Compatible Profiles:
• A2DP (Advanced Audio Distribution Profile): Sends and receives stereo quality audio data
• AVRCP (Audio Video Remote Control Profile): Play, stop, skip, volume control and other AV
device controls
• HSP (Headset Profile): Making calls, receiving incoming and making outgoing mobile phone
calls
• HFP (Hands-Free Profile): Making hands-free calls and receiving incoming and making
outgoing mobile phone calls with hands-free
Charging
Operating time*
Continuous transmission (including music playback time): Max. 6 hours
Continuous standby time: Max. 200 hours
※ The above figures depend on operating conditions.
● The following conditions during charging may cause the red LED to go off before charging
completes.
・ At temperatures outside the operating temperature range (5 to 45°C)
・ The rechargeable battery is defective
If this happens, charge the battery again at the temperature range above. If the battery still
cannot be recharged, contact your Audio-Technica dealer.
● The rechargeable battery may not operate long on the first charge and when it has been
recharged after a long period after not being used. After repeated charging and discharging,
it will become possible to adequately charge the battery.
● The rechargeable battery has reached the end of its service life when battery operating
time after charging shrinks to about half of what it first was. Contact your Audio-Technica
dealer to have the rechargeable battery replaced.
● Do not expose the battery to sudden temperature changes, direct sunlight, condensation,
sand, dust or electrical shocks. Never leave it in a parked car.
● The battery will not be properly charged if the product or the PC enters an energy saving
mode during charging. Check PC settings before connecting the product to a PC. The red
LED will go off automatically also when the PC enters an energy saving mode. Should this
happen, recharge the battery.
● Connect the product directly to the PC using the supplied USB cable. Do not use a USB
hub or USB extension cable to connect to a PC. Be sure to fully insert the plug of the USB
cable into the USB port.
Lithium polymer rechargeable battery is used for this headset. When disposing of this headset,
please comply with local regulations.
Charging USB cable
When battery power is low
A warning sound is heard and the red LED and the blue LED both blink at 0.5 second intervals.
When the battery becomes completely depleted, an ending sound is heard and the power is
automatically turned off.
When the LED start blinking, charge the product according to the above instructions.
USB port
Connection diagram
PC
Micro USB
jack
When charging starts,
the blue LED blinks and
the red LED lights.
This product is not charged when purchased.
You must charge the product before you can start using it.
1. Remove the cap from the product and connect the supplied USB charging cable to the
micro USB jack.
2. Correctly connect the USB charging cable to the USB port of a PC*1.
3. When charging starts the blue LED blinks and the red LED lights. After about three to four
hours of charging the red LED will go off indicating that charging is completed. *2
※ 1 If the USB cable is not properly connected, the red LED on the case blinks.
※ 2 This is the time it normally takes to charge an empty battery.
If power from the last charge remains, charging will end sooner.
When connection history data in the other device has been deleted.
devices that have been paired may have to be paired again under the
following conditions
●When 9 or more devices have been paired
(The product allows pairing for up to 8 devices. When you pair an additional device
after having paired the product with 8 devices, this pairing will overwrite the oldest
pairing data.)
When the pairing data in the product has been deleted due to a repair, for example.
●
●
Continued on overleaf
※To connect to multiple profiles, the paring procedure in steps 4 and 5 will have to be
repeated several times.
※Some devices perform connection automatically to load a compatible profile.
For details, refer to the instruction manual supplied with your mobile phone.
※If pairing is not completed within five minutes, the product will terminate pairing mode
and shut down. Should this happen, perform the pairing procedure again.
※The Reset button (--> page 13) cannot be used to delete pairing data.
Thank you for purchasing this headset. Before using this headset, please read through
these operating instructions to ensure that you will use the headset correctly.
The left earpiece has
a protruding part.
Listening to music
Confirm the following before starting to use.
●The transmitting device is on.
●This product and the transmitting device have been paired.
●The transmitting device supports the music transmission function
(profile: A2DP*)
※For information on profiles, refer to “Supported
version and profiles” on page 2.
This product supports SCMS-T, a content protection method for wireless
technology. It allows you to listen to music (or audio) from mobile phones, One-Seg
TVs and other devices that support SCMS-T.
1. Put on your headphones as shown in the figure
on the right. Place the left headphone (marked L)
in your left ear and the right headphone (marked R)
in the right ear.
2. With this product in power off mode, press and hold
the POWER/EFFECT button for three seconds or
longer. The startup chime sounds and the blue LED
will blink three times as this product is turned on.
3. Refer to the instruction manual of the transmitting
device to connect the
device.
4. Start playback on the transmitting device.
The blue LED blinks during connection.
: Briefly press - Reverse / Press
-and hold - Fast backward
Controlling a transmitting device
If the transmitting device supports operation control functions
( profile: AVRCP), you can use the Operation button on this
product to control the transmitting device*.
Some transmitting devices may not
support this function.
-Briefly press the center, the of the Operation
button to play and pause
-Press and hold the of the Operation button to
stop
-Briefly press the of the Operation button to
forward tracks/and press and hold for fast forward
-Briefly press the of the Operation button to
reverse tracks/and press and hold for fast backward
Operation button
Operation function on
transmitting device
: Briefly press - Play/Pause
: Press and hold - Stop
: Briefly press - Forward / Press
and hold - Fast forward
Press the top and bottom of the Operation
button to adjust the sound volume.
Press the top (+) of the Operation button to
increase the sound volume and press the
bottom (-) to decrease it. Pressing and holding
the Operation button will also allow you to adjust
the volume*.
*A warning beep is heard when maximum or
minimum sound volume is selected and the
sound cannot be set any higher or lower.
UP
DOWN
Sound volume adjustment
using Operation button
To adjust the volume
Press the top of the button to
increase sound volume and press
the bottom of the button to lower it.
5. Turn off this product when you are through listening.
Set the transmitting device to disconnect connection.
After use, press and hold the Power/Effect button for three seconds or longer to turn
this product off.
The ending chime is heard and this product is turned off.
*
This product uses the 2.4 GHz frequency band. Be sure to read and observe the
following instructions to prevent interference with other devices using this frequency
band.
Note